How to Tell a Story with Residential Landscape Photography

How to Tell a Story with Residential Landscape Photography

I recently undertook a project for a prestigious Boston area landscape firm where I was charged with showcasing their work in the residential market. This was a challenging project since I had to capture their work on each property ranging from design, to landscape installation, to property maintenance. Strategically I wanted to frame the nature of the property and the scope of my client’s work then move to tighter shots to create a narrative. The objective for each property, and the project as a whole, was to tell a story.

Read More

Seven Tips on Choosing the Right Architectural Photographer

Seven Tips on Choosing the Right Architectural Photographer

If I was looking for a lawyer or a new doctor I’d probably ask around to see if anyone knew a “good” one but the truth is I probably wouldn’t know the right questions to ask. However, if I asked a lawyer or doctor they could tell me immediately what to look for. In that spirit I want to show you want to look for when hiring a photographer to do work for your firm.

Read More

Using Depth of Field for Better Photos

A hallmark of professional photography is that the photographer isn’t just creating an image but he/she is directing your eye where to go in that image. In a simple photo you might be able to do that with composition alone, but in most cases you need to define the focal point via depth of field. In other words, what the photographer wants to you see is in focus, and everything else is out of focus.

Looking at the image below notice below that the boats are in focus while the foreground and background are blurry — your eye knows right where to go and it makes a much more interesting photo.

In this image, the entire kitchen is in focus – foreground, middle ground, and background. Although you might focus on the faucet because of its prominence, your eye is not being given a strong clue where to go.

Let's take a different approach, say you were a manufacturer and wanted people to focus on the microware. Adjusting the depth of field so the faucet is out of focus and the back wall is in focus makes a significant difference in how you experience the photo. Your eye is drawn to the microwave and it becomes the star of the picture with everything else playing a supporting role.

In the following two photos notice the subtle difference depth of field creates. In the first case the foreground and background are equally in focus, but in the second, the foreground, left side and background are blurred, drawing your eye toward the pool table and fireplace.

Here is another example where the photographer wants to draw your eye toward the middle ground, but in a larger space. Where does your eye go and what do you focus on first? The lamp and red bean bag chairs.

The Traditional Way

Historically photographers created the depth of field and focal points we’ve demonstrated using different lenses and aperture settings. This works just fine but the downside is that it is baked into the photo. You don’t have any flexibility to alter it. If someone decided they wanted the faucet or blue chairs in the images above to be most prominent it would mean re-shooting.

A Better Way

A more flexible way to handle depth of field is to shoot images with a full depth of field and then electronically blur images to create the desired effect. In all the photos you see here we have utilized this technique. This work is typically done by your graphic designer in post production and provides flexibility in your marketing efforts. If you don’t have a graphic designer we can handle it for you as an add-on to our typical post production work.

The Most Bang for you Buck

At ShupeStudios, we've adopted the protocol of shooting most images with a long depth of field to give your marketing team and designers the greatest flexibility in utilizing our photos. Using just one shot, a designer can create multiple images, each with different focal points, giving you more options while reducing costs. This is another example of using technology to give our clients the most for their money.

If you are looking for great architectural photography and maximum flexibility with depth of field, we’re here to help. Now is the time to plan for spring and summer photography of commercial buildings, residential structures, interiors, or landscapes. Give me a call and let’s take a look at your marketing calendar. I look forward to working with you!

Time to Schedule Spring Photography!

Time to Schedule Spring Photography!

Although we recently had a dusting of snow, winter is rapidly coming to a close, with spring right on its heels. Many buildings and projects have been completed since fall, and it is time to get them photographed for marketing purposes. Spring can be one of the best seasons for architectural photography as flowers, shrubs, and trees bloom during April and May. Cooler spring weather means clear, crisp shots and more vibrant color - photos this time of year can be absolutely wonderful.

Read More

Do Photographers Take Their Camera Along on Vacation?

Do Photographers Take Their Camera Along on Vacation?

People often ask me if photographers take pictures when we go on vacation, or if that would be like the mailman taking a walk on his day off. I’ll let you in on a secret, all photographers take their cameras with them and we take lots of photos. The difference, as we see it, is that on vacation we get to make pictures not take them.

Read More

Off to a Fast Start in 2022

Off to a Fast Start in 2022

A fast start in January sets the pace for the entire year. Setting goals, developing a marketing calendar, and freshening up your marketing materials sets the stage for a successful year. Don’t wait, don’t put it off, don’t say as soon as I have free time. I’m listing a few tips to help get things moving forward:

Read More

The Christmas Gift that Propelled a Kid’s Future

When I was in Junior High, I dabbled with the guitar, including lessons at the YMCA and photography using my parent’s Pentax camera. As Christmas approached that year, I made my list asking for money to go towards either a guitar or camera. I was leaning towards a camera - the hot new Olympus OM-1. As we opened our presents on Christmas morning, I realized that my parents and grandparents had placed checks and cash into an assortment of festive boxes and wrappings throughout my gifts. In dribs and drabs, I saw enough money coming in that maybe, just maybe, I’d have enough. As soon as I could, I bolted to my room with my Christmas money, pulled out cash I had saved from summer jobs, and began counting. Dollar by dollar, I counted until there it was - I had enough to buy the Olympus OM-1!

Some of my first “architectural photography” as a kid

At that time, Hunt’s Drug of Malden (now called Hunt Camera) was open 365 days a year. I convinced my parents to drive me down there that Christmas afternoon to buy my very first camera.  The OM-1 was perfect, and I used it almost every day until I got to the Rochester Institute of Technology (RIT). I was always thankful to Hunt’s Drug for being open that Christmas day.

One of my first Holiday compositions with the OM-1

In the years following, Hunt’s Drug became my go-to camera store. As I prepared to leave for college, I learned that RIT wanted incoming photography students to have a 4x5 view camera. So, with the money I had saved from my part-time job at Balston Filter Company, I went back down to Hunt’s Drug to buy an inexpensive 4x5 view camera. It was a quiet weekday, and the owner was there. He overheard me reminiscing about my first camera purchase there on Christmas and that I was back to buy a 4x5 view camera. I explained that I was leaving for college and had just enough money for a basic unit. The owner paused and said, “ hold on, I might have something better.” He went out back and returned with a Sinar 4x5 kit. Sinar is a high-end Swiss manufacturer, the Porsche of view cameras. He said to me, “It has been out back collecting dust, the person who ordered it backed out. An no takers since.” He sold it to me for the funds I had on hand. At RIT, everyone gawked at my amazing camera. Even the school had only one in their inventory.

Yours truly showing some of my early work as an undergrad

As college ended, I wound up with all-new equipment in a way I could not have foreseen. About three weeks before graduation from RIT, our apartment in Rochester was broken into. The thief took my Sinar and my Nikon cameras, plus my roommate’s 2 ¼ Hasselblad system. They left the stereo. The police said it looked like one of our fellow students planned to set up a studio with our equipment. We never saw it again. But the insurance payment enabled me to start my career with the latest Nikon camera equipment. It goes without saying; I purchased it from Hunt’s Drug.

Fast forward to last month. Nikon announced a new camera with a dynamic range larger than my present equipment. The mirrorless Z9. It is a fantastic camera for Pros only and nearly impossible to obtain. Off I went to Hunt Camera, who worked miracles, and as soon as it is released, I’ll be at the head of the line to receive this superb piece of equipment.

That gift propelled this kid into a 40 plus year career as a leading edge professional photographer

Looking back over these many years, it’s amazing to think about the power of a gift or a small act of kindness. Consider a business owner who reached into his own pocket to help a kid on his way to college or a business that has come through for me time after time during my career. We often think of the Holidays as a time for presents – and of course, it is. But even more so, it is the opportunity to give a gift – something with the power to fascinate, inspire, and lift us up. Gifts can be for fun, or they can move mountains. That ride to Hunt’s on Christmas day so many years ago lit a spark, launched a career, and changed the trajectory of my life. It was a Christmas gift that propelled a kid’s future.

Merry Christmas and Happy Holidays to All

Gregg


How Photographers Price Their Services

How Photographers Price Their Services

I find that pricing is a bit of a mystery for most clients so I thought I’d take a few minutes to explain the various pricing options used by photographers as well as what goes into a shoot that creates cost. What may seem like a fairly simple process is likely more complex than most imagine.

Read More

Schedule Your Fall Photography!

Fall can be a magical time for architectural photography and landscapes. Less moisture in the air means cleaner crisper shots and more vibrant color. However, you are dealing with a short window and mother nature can be fickle – start now and you have more options.

007-772ee_101014.jpg

Landscapes

Once September arrives plants have had a full growing season behind them and have recovered from summer dryness. Lawns are greener, plants look healthier, and the landscape is more lush. In many respects fall is the best time of year for landscapes. If your intent is to make the best impression - think fall.

073_200818_Tree_House_Brewery_Charlton.jpg
079_190903_Appletree_Lane_Sudbury.jpg

Building Exteriors

Building construction tends to finish in the fall so you will be shooting completed projects while everything is new and fresh, with easy access to the premises. It also means that this year’s projects can be photographed and utilized for marketing purposes during winter and spring. Too many times I’ve seen people wait for spring only to be done in by weather and lose months of promotion.

2135_180916_Meriel_Marina_Bay_Quincy.jpg

If your building is under construction fall exterior shots allow you to make it appear that the project is farther along and provides the opportunity to merchandise it in advance. Good examples are apartment buildings or condo complexes where you will be pre-selling prior to project completion. Photos go a long way toward helping people visualize your project, making for an easier sell.

Fall Foliage – or Not

Landscape photography in the fall doesn’t necessarily mean that it has to include fall foliage. The great thing about fall is that you can get the best of both worlds – a nice summer feel or a colorful fall foliage scene. Your subject matter and the purpose of the photo will be the guiding factors. For example, you may want your building to say summer - while a cozy outdoor fireplace is perfect with a little fall foliage.

F5.jpg
524_201105_Tempo_at_Alewife_Station_Cambridge.jpg

Stick Season

I spend a lot of time in Vermont where they refer to late fall, when the leaves come down, as stick season. You might think that when stick season arrives all is lost, but we can often pull a rabbit out of a hat. Shot at the right time of day with the right lighting trees are less visible, with the added bonus of showing off the architecture. For example, in summer you can barely see the first two floors of the building below. (This is a great example of a just-completed building that can be promoted throughout the winter and spring as discussed above.)

270_200109_Clarion_Roxbury.jpg

Another option in stick season is shooting at dusk, i.e., magic hour, where the lack of foliage goes unnoticed and can make for a terrific shot - with your building architecture in full view.

429_191121_The_Cove_Hingham.jpg

Don’t Wait

At ShupeStudios our goal is to wow you this fall. If you need a head start on next year for residential structures, commercial buildings, or landscapes - fall photography can provide superb results. However, the window is rapidly closing so the time is now. Please give me a call and let’s make it happen.

Pulling it All Together

I just finished a four-day shoot that allowed me to provide my full suite of skills to one client at one time. This enabled a big picture approach to the project eliminating inefficiencies, saving money, and most importantly, giving them a better end product. From my perspective, it was a great challenge and an enjoyable four days working with a terrific new client.  

The project came to me due to a referral from one of my current clients, which I greatly appreciated. My new client Anisoptera Mercantile has a new business offering wellness products, including CBDs, and art selections, to the 45-70 age demographic. In particular, they target people that lead an active lifestyle which informed much of the styling, props, and locations used throughout the shoot.

895ee_210815_Anisoptera_Mercantile.jpg

Every good project starts with a well thought out plan, and this was no exception. We began with several ZOOM meetings to brainstorm, discuss the products, and think about the most appropriate lifestyle shots for this target group. As we continued, the plan came into focus, including props, locations, composition, and all the factors that make the difference between good and great. Let me walk you through the project.

Days 1 and 2

We started with a two-day studio shoot photographing individual products for use in the eCommerce portion of the website. We started with tight shots on a white background that needed to be easy to identify and differentiate.

This was followed by product groupings where we added lifestyle props to enhance the message and add interest.

We even used studio shots to put the product into use applications our target audience could readily relate to.

Day 3

On day three, we went on location to begin the lifestyle portion of the shoot. One of my clients, Baystone Development, graciously allowed us to use their high-end Beachhouse model apartment and amenity spaces throughout the complex to put the products in appropriate lifestyle surroundings. The location was perfect and afforded us the ability to stage products in a variety of settings.  

634e_210812_Anisoptera_Mercantile.jpg

Day 4

On the last day of photography, we shot on location in Gloucester. During the planning process, I had scouted area locations, so we were highly efficient moving from shot to shot - covering a lot of ground in one day. The location shooting effectively framed the brand and told the active lifestyle story so important in attracting our target audience.  

703_210815_Anisoptera_Mercantile.jpg

This project allowed me to provide a full line of services, from implementing brand strategy to art directing. I enjoyed the studio work that calls on a very separate set of skills from architectural or location photography. By art directing, styling, and location scouting, I provided one-stop shopping for my client - saving them the expense and effort of hiring separate specialists for each aspect of the project. Not only that, but having one person in charge allowed both the client and I to see the big picture - resulting in a more effective shoot that produced a superior end product in less time with less cost.

My new client’s website is stocked with all the images they will need for a while, plus we filled their social media library with months of photography.

At Shupe Studios our goal is to wow your audience. If you have a large shoot coming up with a mix of studio and location shots, I hope you’ll reach out to me.

We provide one stop shopping for great photography.

A Picture is Worth a Thousand Words

When you show vs. tell you create a more powerful message and are way ahead in the marketing game. Therefore, using pictures to illustrate your point is important, but even more important is using pictures to tell a story that engages your viewer. Easier said than done. It takes a great photographer, advanced planning, and the ability to construct a compelling narrative. Let me explain some of the key elements in telling a great visual story.

433_191024_East_Boston_Attractions (1).jpg

When You Create a Story - Less is More

Just like the fact that a long speech is seldom better than a short one, a good photo story isn’t a data dump of images - less is more. Show fewer, better pictures that include as many elements as possible to help tell your story. For example, in the images below we see the living room and kitchen front and center but you can also see into the bedroom. This tells a bigger story without the need for multiple photos. It is also creates visual intrigue about what is in those rooms or behind those other doors.

009_181206_Cambridge_Park_Apartments.jpg
013e_210601_Boott_Mills_Lowell-HDR-Edit.jpg

Another example of this technique uses an outdoor shot to show multiple facets of a property. The picture below quickly tells us the property is located on the water in an urban environment. As you look farther into the image you realize this property is a wonderful place to sit on your patio to watch a sunset, gather with friends, walk your dog, or perhaps even go for a boat ride. No need for multiple shots - this well composed photo says it all, and tells a great story.

142_200619_Clippership_Jazz_Lifestyle.jpg

Creating a Mood

Sometimes an important part of telling the story is creating mood. By combining subject matter, composition, lighting and perspective you can create a mood that far surpasses what you could do with words. The image below, although devoid of people, radiates energy and the potential for fun and good times. What better way to sell people on your location than establishments that will engage with your target audience. The second image illustrates a different mood and creates a different type of story with a cozy, protected roof deck perfect for entertaining friends or just relaxing on a summer evening.

313_210408_Dorchester_Lifestyle.jpg
628ee_200921_Halstead_Salem_Station.jpg

People

People love watching people. When you see a well composed image with people a story immediately begins to unfold. This picture is focused on the lone bicycle rider. If you are like most people you will ask yourself who are they, where are they going? This leads to the larger story of their surroundings and how they live.

222_191014_Bruce_Freeman_Rail_Trail_West_Concord.jpg

Composition and Perspective

The same location shot with a different composition and perspective can drastically change your story. The first image below shows a somewhat intimate scene of three chairs. However by walking a few steps to the right the second image tells a completely different story.

Let Us Help You Tell the Right Story

Every type of property needs the right story to connect with your target audience. New, old - or just coming out of the ground - we take Commercial, Corporate, Academic, and Residential (home, apartment, condo) properties and build a great story. It may be the story of its architecture, amenities, neighborhood, points of interest, mass transit access, or fun restaurants. Whatever the objective don’t just settle for a picture - instead tell a story.

If you need architectural photography I offer two important services at no charge to you:

- A free brainstorming session to identify the right story.

- A free pre-shoot walk-through to stage shots, and identify opportunities to get the perfect narrative

At Shupe Studios our goal is to wow your audience. If you’re in the Boston area or greater New England, I hope you’ll reach out to me.

We provide one stop shopping for great photography.

Don't Forget to Shoot for Social Media

When planning for a photoshoot, people typically fixate on the primary need – for example, their website or an announcement. Consequently, they’re looking for that grand shot or one key image that says it all, and once they get it, sayonara. Nothing wrong with getting an elegant shot, but why stop there? With minimal effort, you can get so much more.

 Plan for Social Media

Social media has become an essential marketing vehicle for many businesses – in some it can supersede your website and print advertising for raising awareness and staying top-of-mind. Too often, though, social media is an after-thought in photography. With a bit of planning, you can make your photoshoots work a lot harder for you and really amp up your performance. Social media allows you to tell a story, for example, don’t just say you are near mass transit - show it.

182_210610_Ruggles_MBTA_Platform.jpg

Look for Stories

I normally give alternative views/angles that can be used for advertising and presentations. However, I like to take it even further – by thinking about what stories might be present for social media.

In advance of the photoshoot, I ask clients to think about their social media target audience – who are they, what motivates them, what will they react to? We set a plan, thinking about stories or messaging that will engage them, then build it into the shoot.

For example, on recent residential building shoots we’ve developed stories about location, renewable energy, cool common rooms, and unique fitness facilities along with a host of other forward-thinking construction details and amenities.

Keep Your Eyes Open And Go With The flow

Sometimes stories are planned, and other times they simply appear. Some of my best photographs are due to a combination of serendipity, inspiration, and luck. If you keep your eyes open for a great story, it is amazing how often one will appear.

Green spaces for the public tell a great story, as well as new technologies such as phone access to your unit or web-connected heat systems. Sometimes even small details capture people's imaginations – not too long ago, I noticed a doggie drinking fountain, took pictures, and voila, it became a terrific post.          

Get A Second Set Of Eyes

Social media experts have a great sense of what will play to their audience. They may see ideas overlooked by others knee-deep in other aspects of the shoot, so bring them along. You never know where a good idea may come from.

Give Social Media its Due

Social media warrants a seat at the table, so don't short-change it when dealing with photography. The medium offers a terrific opportunity, so plan for stories and look for opportunities while behind the camera. With minimal effort, you can get so much more.

If you are an architect, builder, developer, or business owner I’ll work to understand your social media objectives, make suggestions, plan the shoot then provide photography that wows your audience. The purpose of social media is to bring your business alive by telling a story – let us help tell yours.

Think I can wow you? If you’re in the Boston area or greater New England, I hope you’ll reach out to me at Shupe Studios.

Setting the Mood

Mood is what brings photography alive. We all use it -- every time you take a snapshot and yell “smile!” you are creating mood.

In professional photography, mood can be almost as important as the subject matter. The rendering of the subject “tells” you but the mood makes you “feel.” Feeling is what creates a brand and ultimately what moves someone toward purchasing your product or service.

Professional photographers must answer a fundamental question: what does my client want this photo to say, and how should the viewer feel after seeing it? For example, a photo can make us excited, sentimental, impressed, motivated, or a host of other emotions that can move them toward your brand and making a purchase.

Let’s look at how certain elements in photography create mood and impact our feelings.

Color and Warmth

Warm-toned images create a relaxed, inviting feeling. An image like the one shown below evokes positive feeling such as - I’d like to be there, or, that looks like fun. Warm tones set a great mood for businesses such as travel or romance.

A blue-toned image creates a colder, less-inviting impression. It can be used to add an element of foreboding, grittiness, or mystery. This type of tonality tends to make something feel ominous, or in other cases creates a harsher, more edgy look.

Soft vs Bright

We have been trained to associate soft lighting with something that is relaxing, soothing or perhaps somber. Conversely, light and bright evokes energy and positive feelings. The two images below offer a striking contrast - both are floral but you can see that soft brings your blood pressure down and says - relax, whereas sunny and bright lifts you up, and radiates energy.

7445_210508_Gregg_Shupe_iPhone.jpg

Composition

Composition impacts mood through its effect on your eye. Leading lines bring you to a key visual point so your brain and eye don’t have to work as hard. In essence, the image tells you what it wants you to see. It is clean, ordered and visually relaxing. The first shot is an example of excellent architectural photography.

With an un-composed or cluttered image your eyes don’t know where to go. It’s not clear what the image is trying to tell you and this subliminal frustration creates a negative feeling. You tend to move away from this type of image. That is why cluttered, busy advertising tends to be less effective.

Symbolism and Texture

The combination of symbols, texture and lighting make a huge difference in mood. Warm wood vs. cold steel, dark night or blue sky. Take a look at the two photos below - where are you going for a hi-tech seminar and where would you want to kick back and enjoy the company of friends?

Architecture

In architecture a normal lens in a tight area can imply a safe, intimate space whereas a wide angle view sets the mood of a large open space and all the feelings that go with it. As you can see below the same space shot with a different lens will have a very different feel.

As a client it, is easy to overlook mood and focus on the subject matter. However, when selling your products and services think of mood as the secret sauce for advertising success.

Work with a photographer to set the visual mood that best fits your brand, bolsters your message and exemplifies your product, project, location or service. Mood is an important piece of equipment in your advertising toolkit, be sure to use it to its fullest.

If you have an important shoot on the horizon I offer two important services at no charge to you:

- A free brainstorming session to identify the right mood to tell your story.

- A free pre-shoot walk-through to stage shots, forestall issues, and identify opportunities to get the perfect shot that says it all.

At Shupe Studios our goal is to wow your audience. If you’re in the Boston area or greater New England, I hope you’ll reach out to me.

We provide one stop shopping for great photography.

A Website Developer Explains How to Take Your Site From Good to Great

We have a guest author this month, Jeff Shaw, Principal of Envision Marketing & Design, Inc., a website development firm located in Metro Boston.

As a website designer I do an extensive amount of work with photography. In fact, in a highly visual medium like mine, it is not an exaggeration to say photography is the key to taking a website from good to great. There are three sources of photography - stock photography, do-it-yourself (DIY), and professional custom photography.

Stock Photography

Buying stock photography has two primary advantages: lower cost and it is instantly obtainable. The major drawbacks are that stock is predictable, readily identifiable as stock, and detracts from the authenticity of a website. Stock photos are generally a bit contrived and will be a force fit into your design. The holy grail of marketing is the unique point of difference you have versus competitors; however, stock photography dilutes that message either overtly or subliminally. Take a look at two examples below.

This stock photo looks sterile. The name has either been photshopped off or the word school photoshopped on. Plus I’m not sure this building is really a school, it may actually be an office building.

This stock photo looks sterile. The name has either been photshopped off or the word school photoshopped on. Plus I’m not sure this building is really a school, it may actually be an office building.

Why is a woman standing above a factory floor looking at her Ipad? This stock photo demonstrates a major downside of stock - it typically looks contrived.

Why is a woman standing above a factory floor looking at her Ipad? This stock photo demonstrates a major downside of stock - it typically looks contrived.

Do-it-Yourself Photography

It can be tempting to use a friend “who has a good camera” or pull out your trusty iPhone. However, it is the person behind the camera, not the camera, that makes for great photography. Not only does a pro produce shots that are head and shoulders above amateur work, but their capabilities in post-production and photoshopping are something an amateur can’t come close to. Below is a DIY photo I was recently given for a website - what kind of impression does it make on you?

This DIY photo does no justice to this facility. The picture is poorly composed, shot on a cloudy day, has no life, is distorted and would detract mightily from an otherwise very professional site. I didn’t use it.

This DIY photo does no justice to this facility. The picture is poorly composed, shot on a cloudy day, has no life, is distorted and would detract mightily from an otherwise very professional site. I didn’t use it.

Custom photography

Hands down, I prefer professional photography when developing a design. It is much higher quality and displays your company, products, or services precisely the way you want them to be seen. It also allows me to storyboard your marketing message and develop a compelling visual narrative for your viewers. It is true that professional photography is more expensive than stock but looking at cost is just one side of the equation. Custom photography tells a more compelling story, provides a stronger message, and builds your brand. That combination drives sales, and in the end, it is not how much you spend but how much you make.

Example of Professional Architectural Photo

Example of Professional Architectural Photo

Example of Professional Photographed Self Perform Employee Photo

Example of Professional Photographed Self Perform Employee Photo

A picture truly is worth a thousand words and makes a significant impact on your target audience. After 20 years in the field here is my advice: Avoid DIY photography like the plague. Stock photos win on price, and if the budget is tight, use them if you have to. However, if you want the most professional website possible, you need custom photos. In my line of work, hands down, custom photography takes a website from good to great.

Strength in Numbers … or Not

A question that frequently comes my way is “do I need to hire different photographers for different types of photography on a large project?” The simple answer is, not necessarily. There is a tier of photographer with the training, experience, and aptitude to be able to handle this type of complex shoot – and do it very well.

Scenario 1

Let’s take the example of resort photography. They need outdoor and indoor photography of buildings, amenities such as golf, hiking trails, shopping, and local points of interest.

104_100615.jpg
327_161007_Gadd_Brook.jpg

Food and entertainment would naturally be included which could include shots of food,

3548_180619_iPhone_Gregg_Shupe.jpg

and of course restaurants, and the resort environment.

126e_180612_Cohasset_Country_Club.jpg

No photoshoot is complete without “people” shots for example, guests enjoying themselves in a spectacular setting.

455e_combined_100615.jpg

The headaches of scheduling multiple photographers, not to mention costs are obvious. A far better option is to have one person do it all.

Scenario 2

A business relocating to a new facility frequently needs multiple types of photography. This could include architectural photography showcasing their new facilities and offices. In addition, it is likely this would be a good time to update product shots in the studio and in the market, staff images, and perhaps ancillary shots for a new website or brochure. Like the first scenario it is far easier hiring and managing just one photographer instead of several. (Easier on the wallet too.)

381_190624_Kirwan_Surgical_Products.jpg
166_191021_Middlesex_Gases_Technologies.jpg
767_191104_Middlesex_Gases_Technologies.jpg

Seeing it in Action

The photos below have a common link – they were all shot by yours truly doing exactly what I’ve described - ranging from aerial to people.

Aerial

Aerial

Food

Food

Architectural interiors

Architectural interiors

Products

Products

Architectural exteriors

Architectural exteriors

People

People

While I love my specialty of Architectural Photography I’m frequently called upon to handle complex projects with multiple needs. It saves my clients time, hassles and costs – as well as providing a better end product since the project is undertaken in a holistic manner versus many people contributing pieces.

If you have a complex shoot on the horizon I offer two important services at no charge to you:

·         A free brainstorming session to identify and formulate great images that tell your story.

·         A free preshoot walk-through to stage shots, identify opportunities and very importantly to forestall issues. (You would be surprised at how many disasters have been preempted by a thorough project walk through.)

This process allows me to understand your objectives, make suggestions, plan out the shoot and then provide photography that wows your audience. If you’re in the Boston area or greater New England, I hope you’ll reach out to me at Shupe Studios.

We provide one stop shopping for great photography.

The Art of Photographing Small Spaces and Tight Interiors

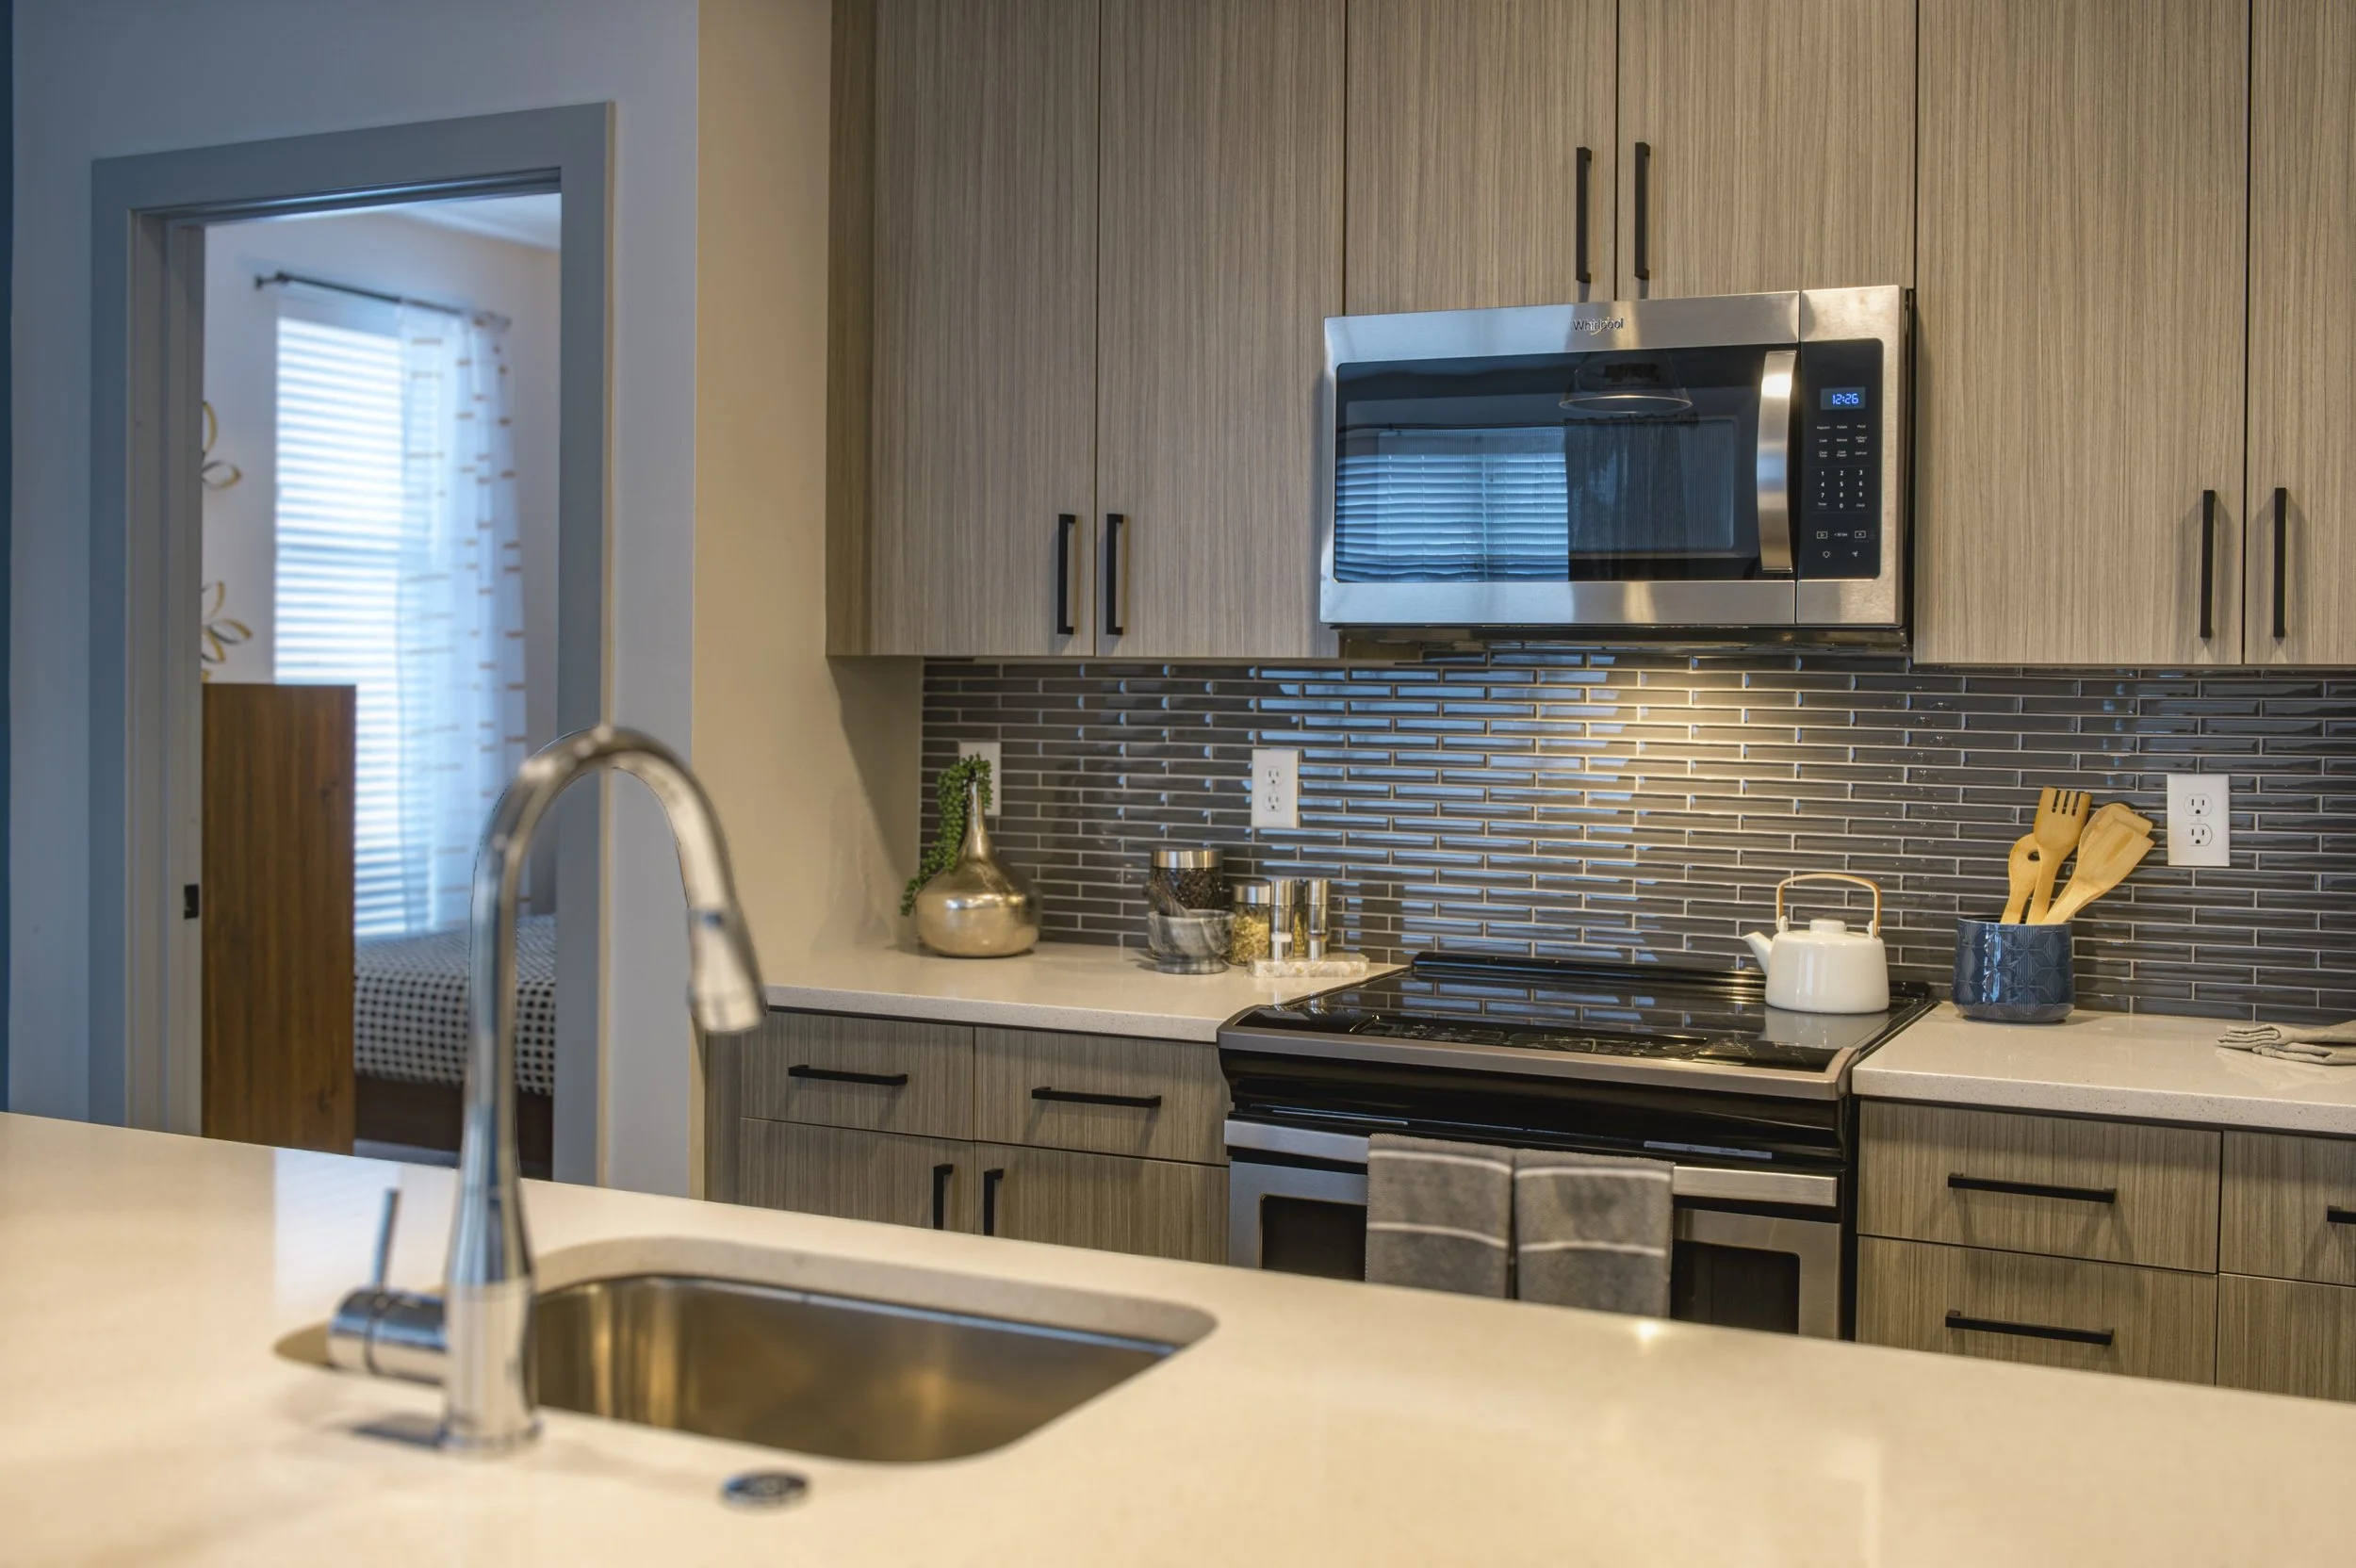
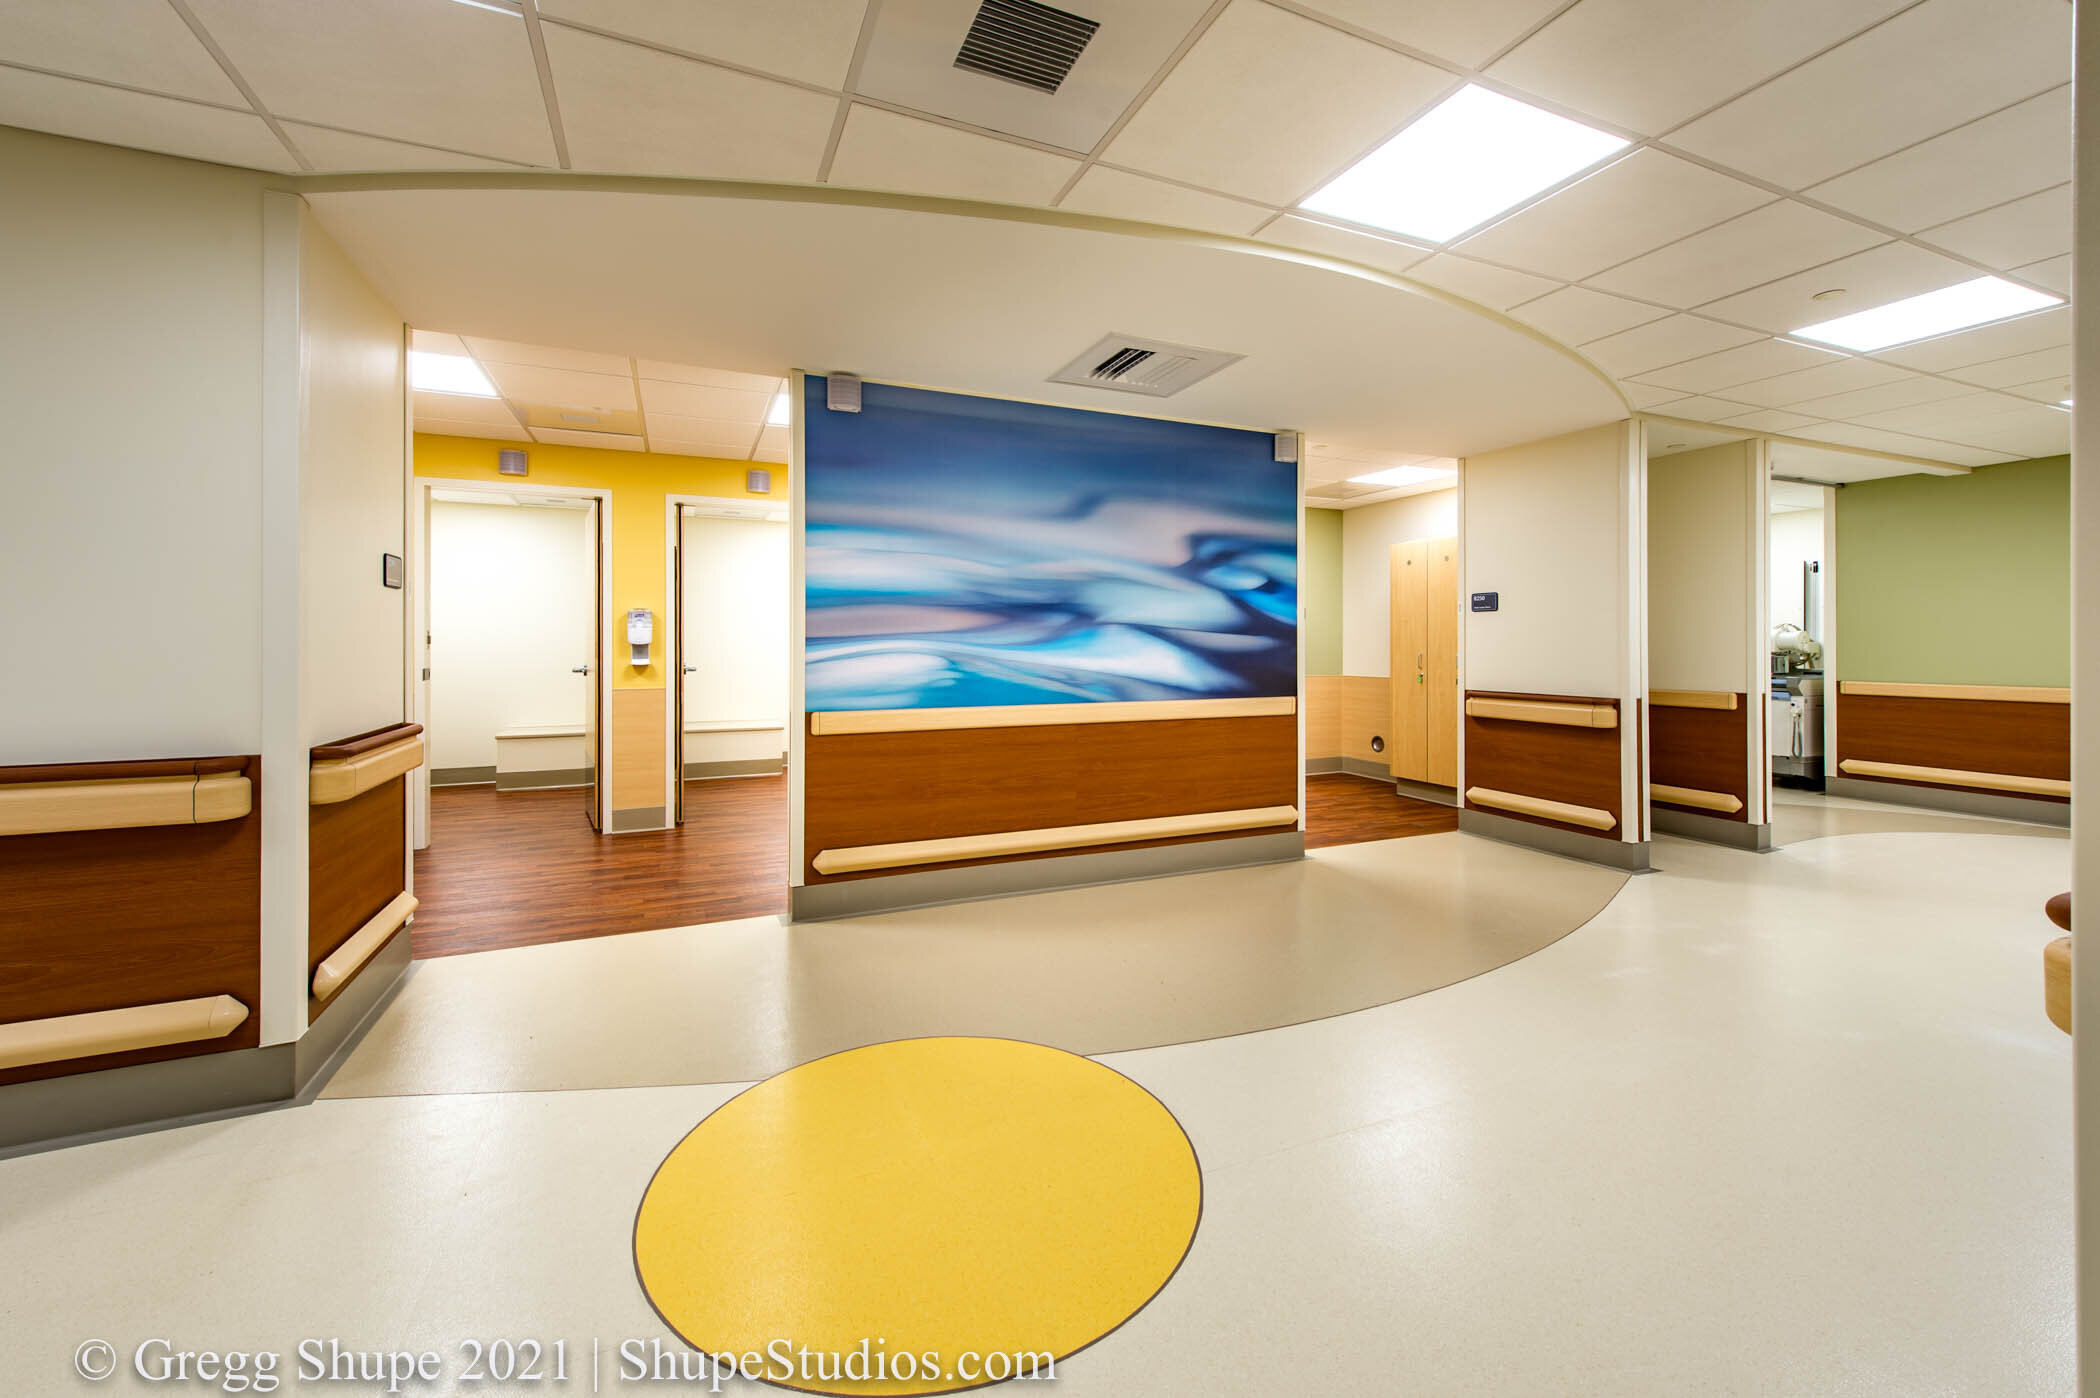
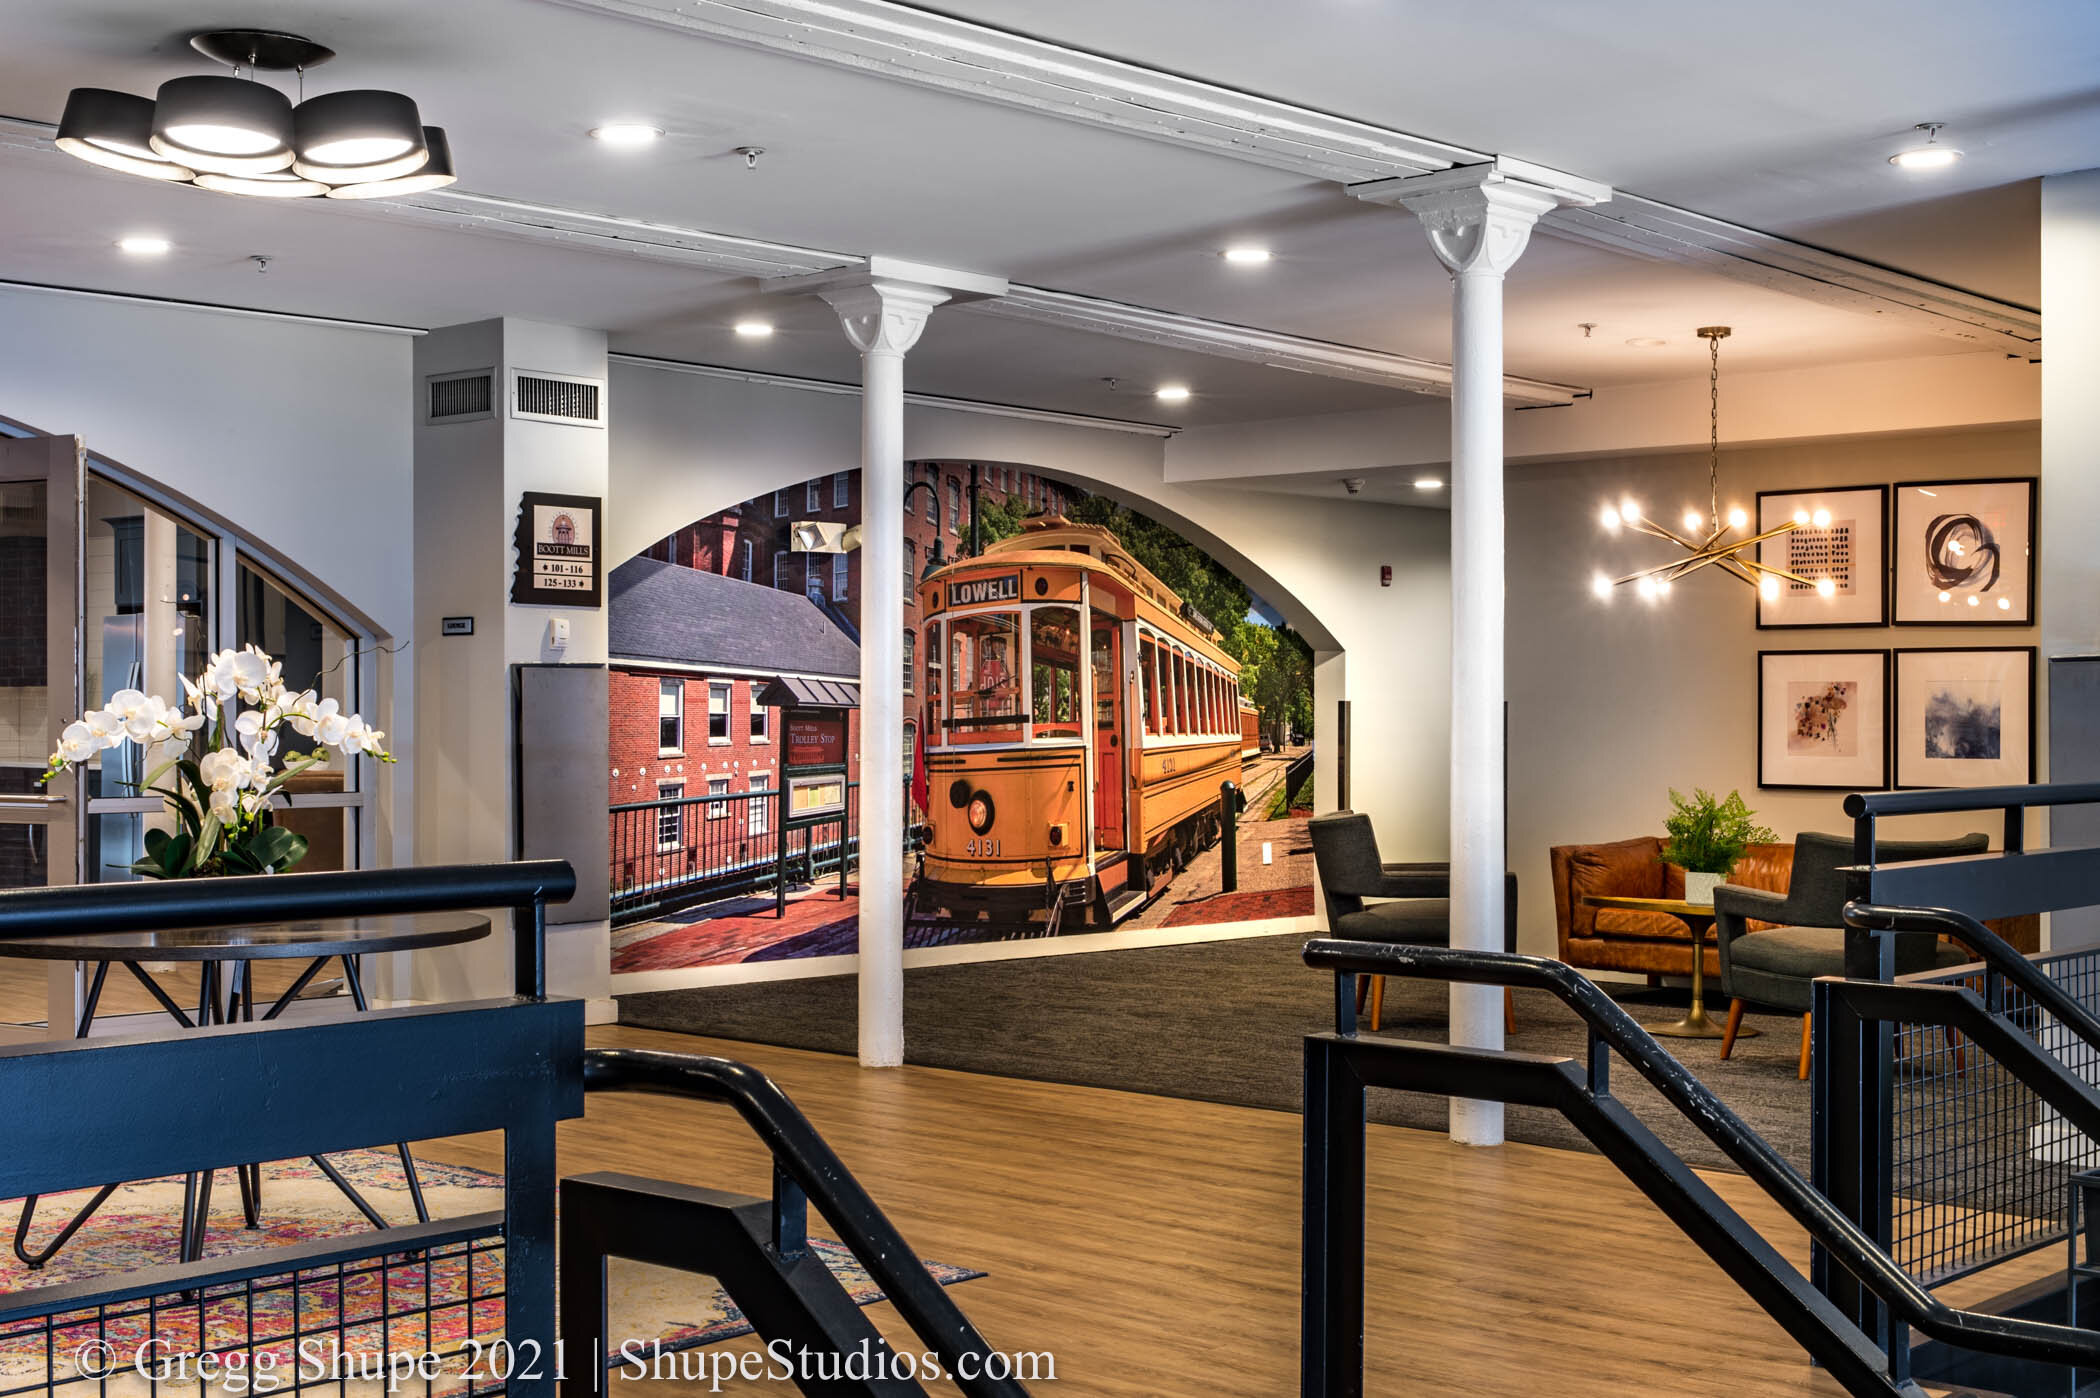
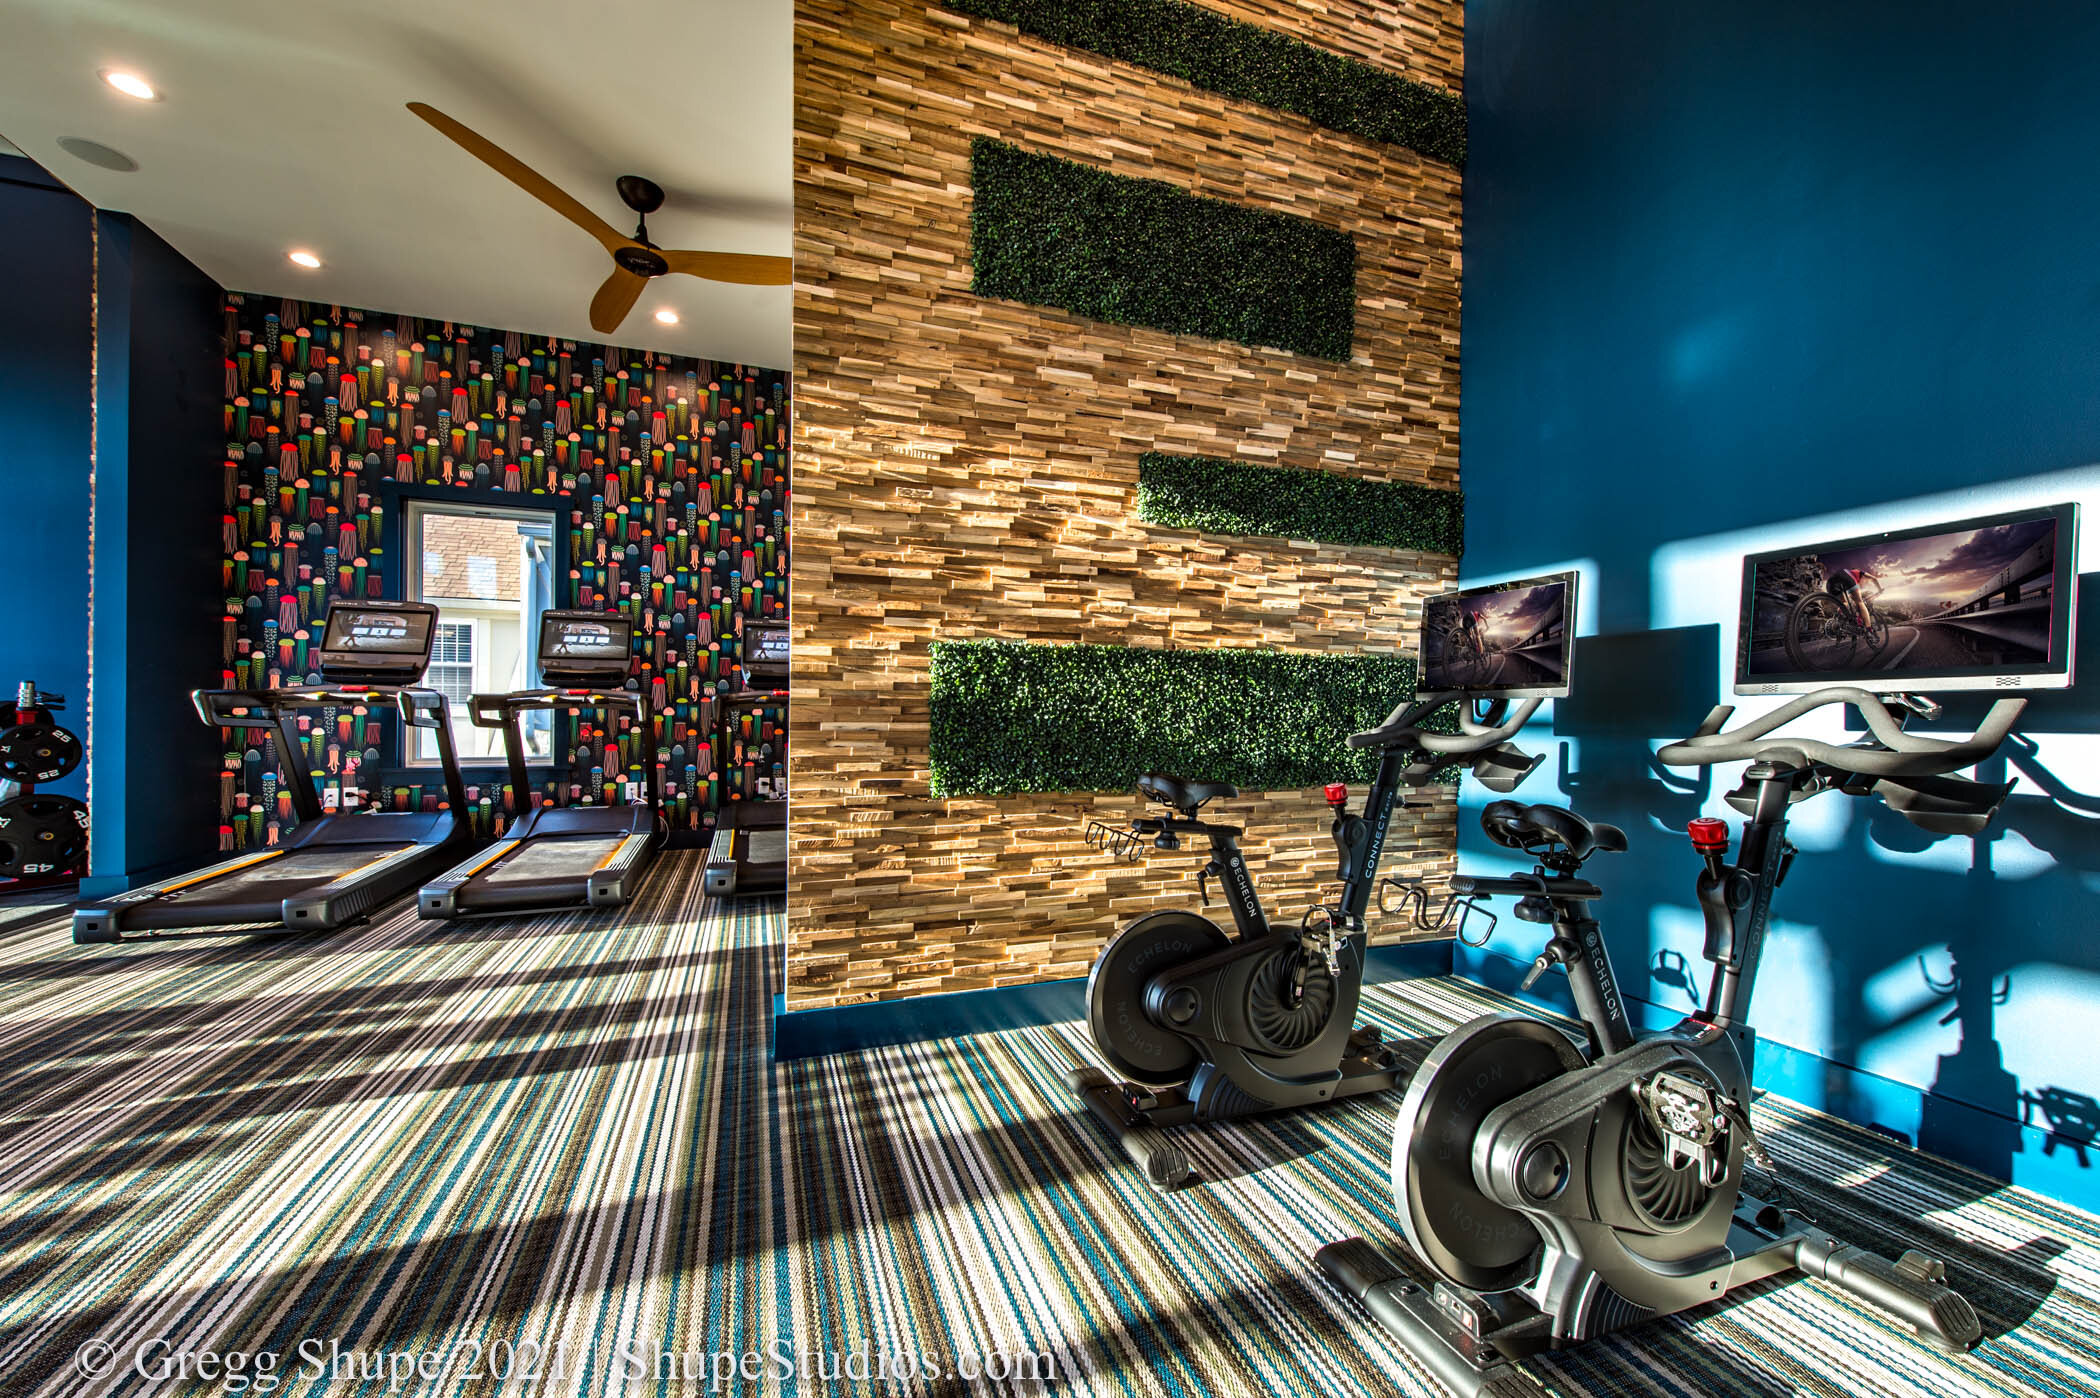
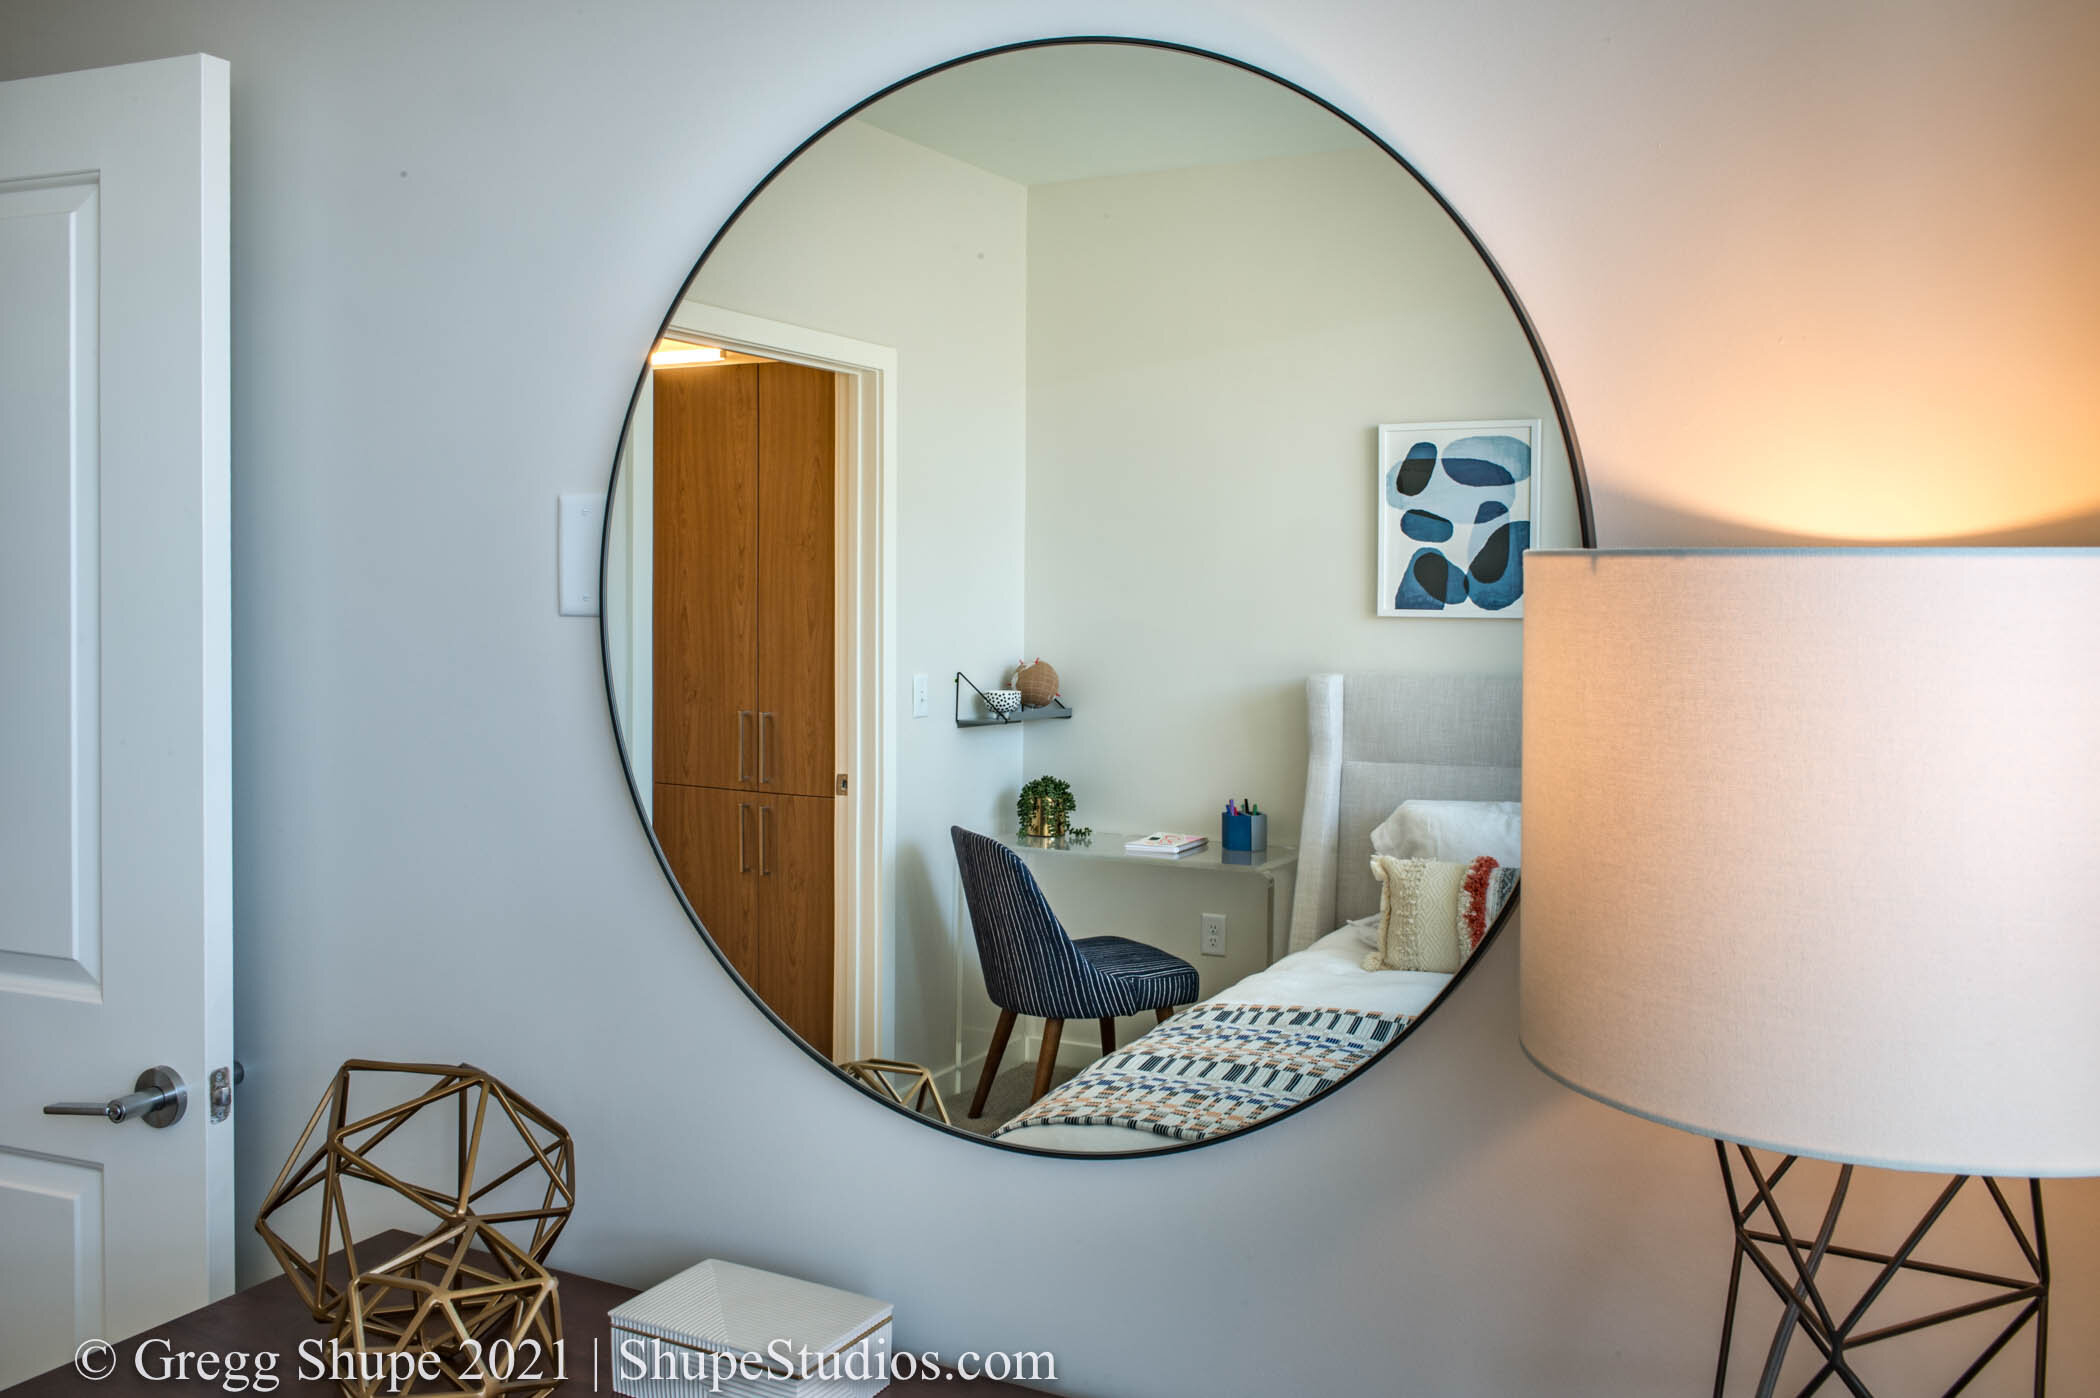
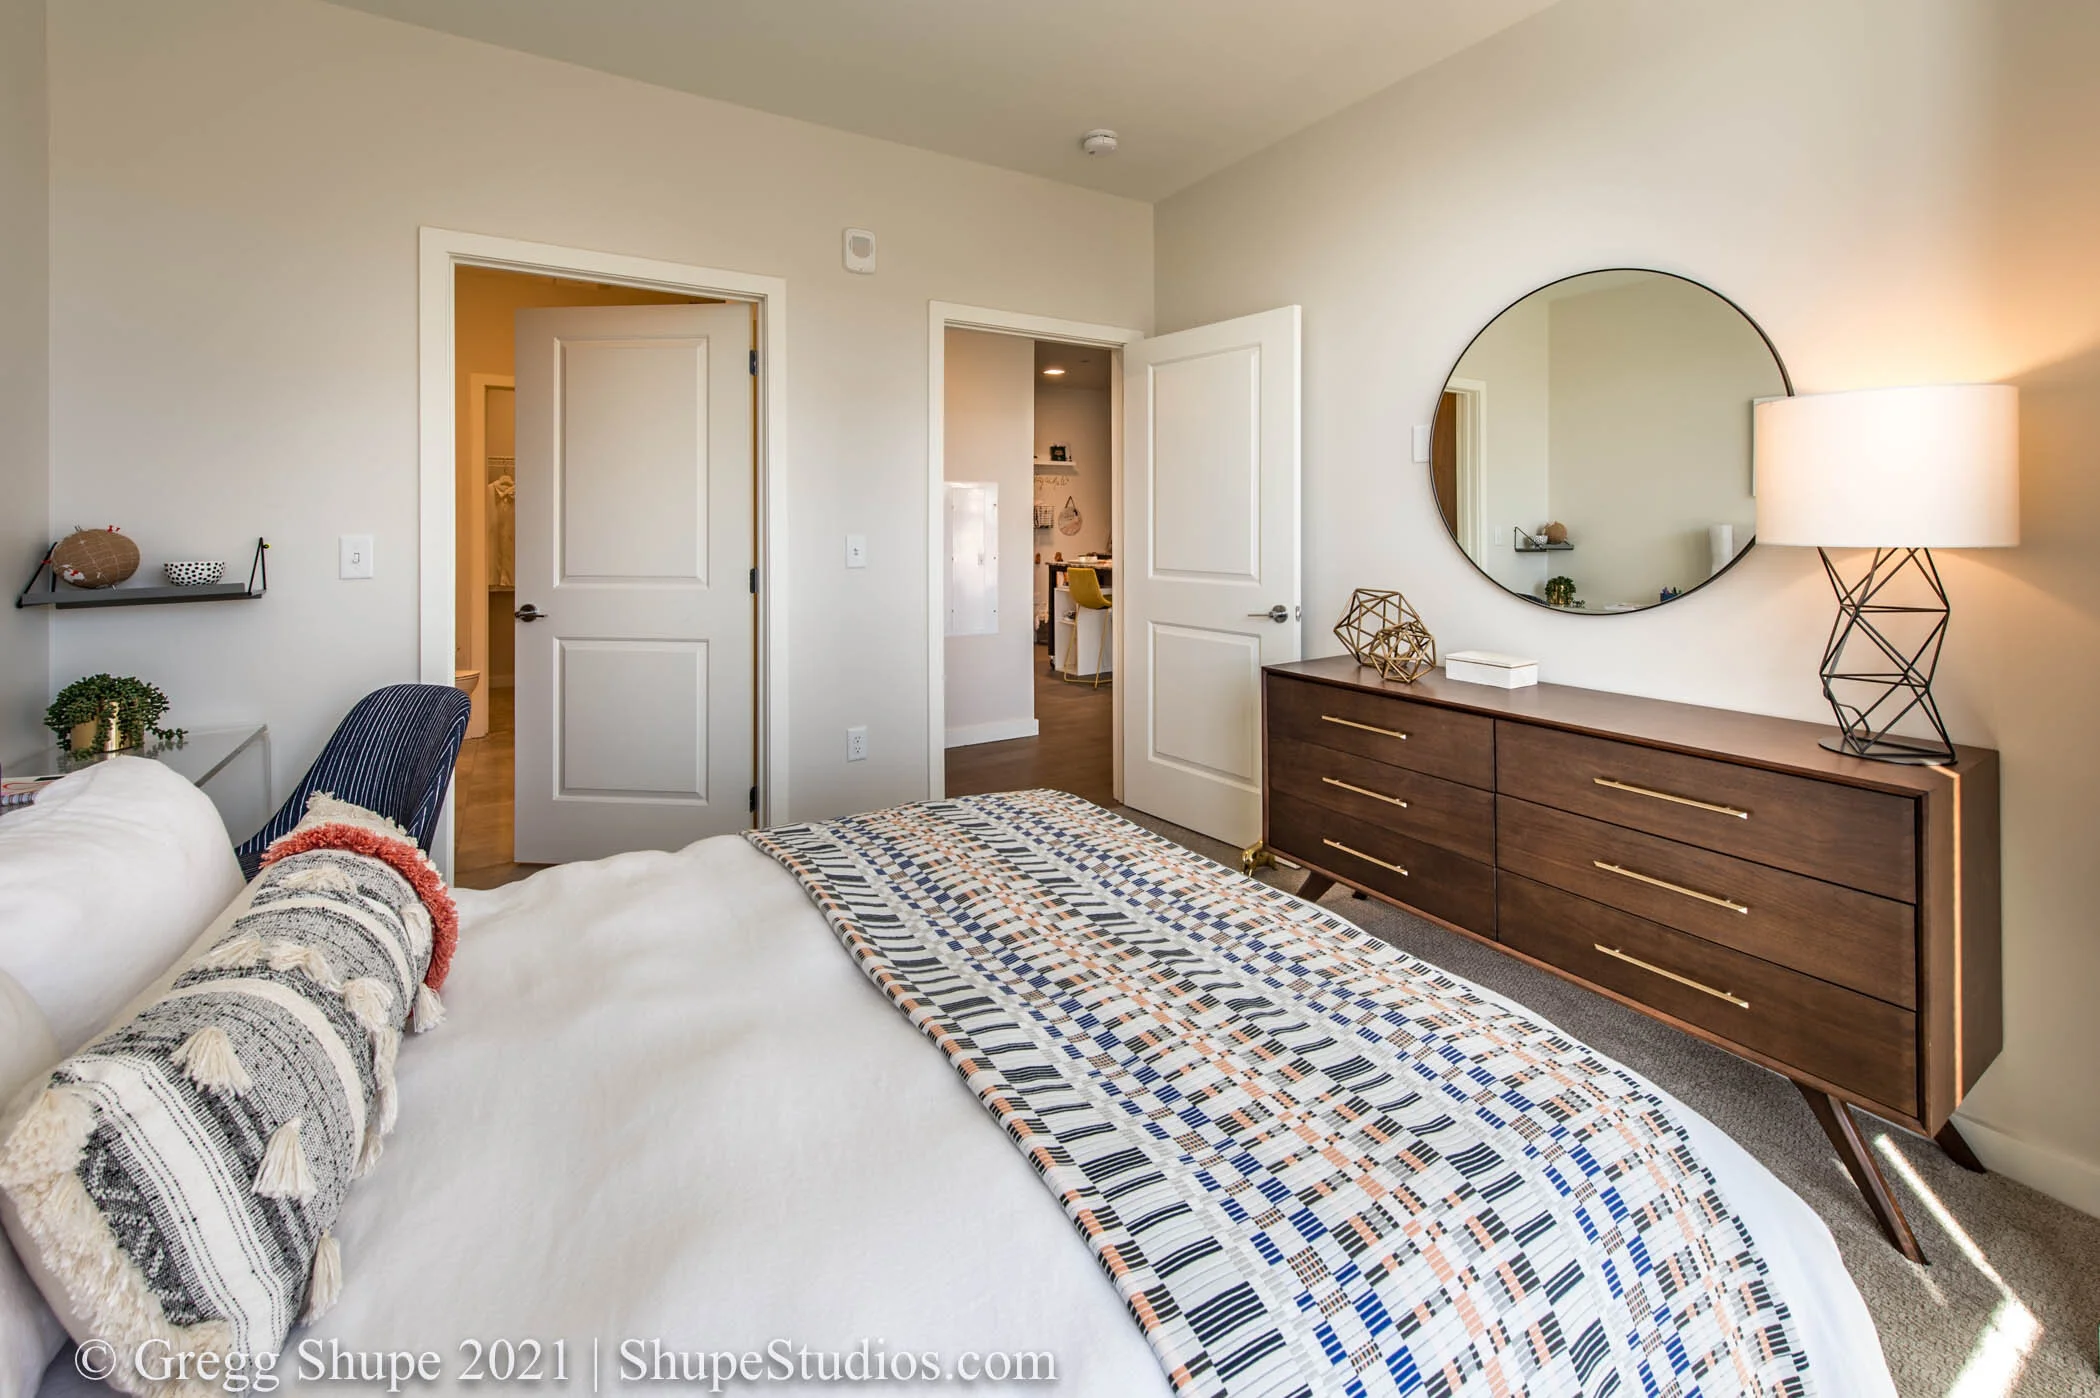
As an architectural photographer one of the toughest challenges I face is shooting tight interiors. Inside you’re dealing with physical space constraints, different light temperatures, uneven room lighting, room angles, and the challenge of capturing a space from just one vantage point.

Lens

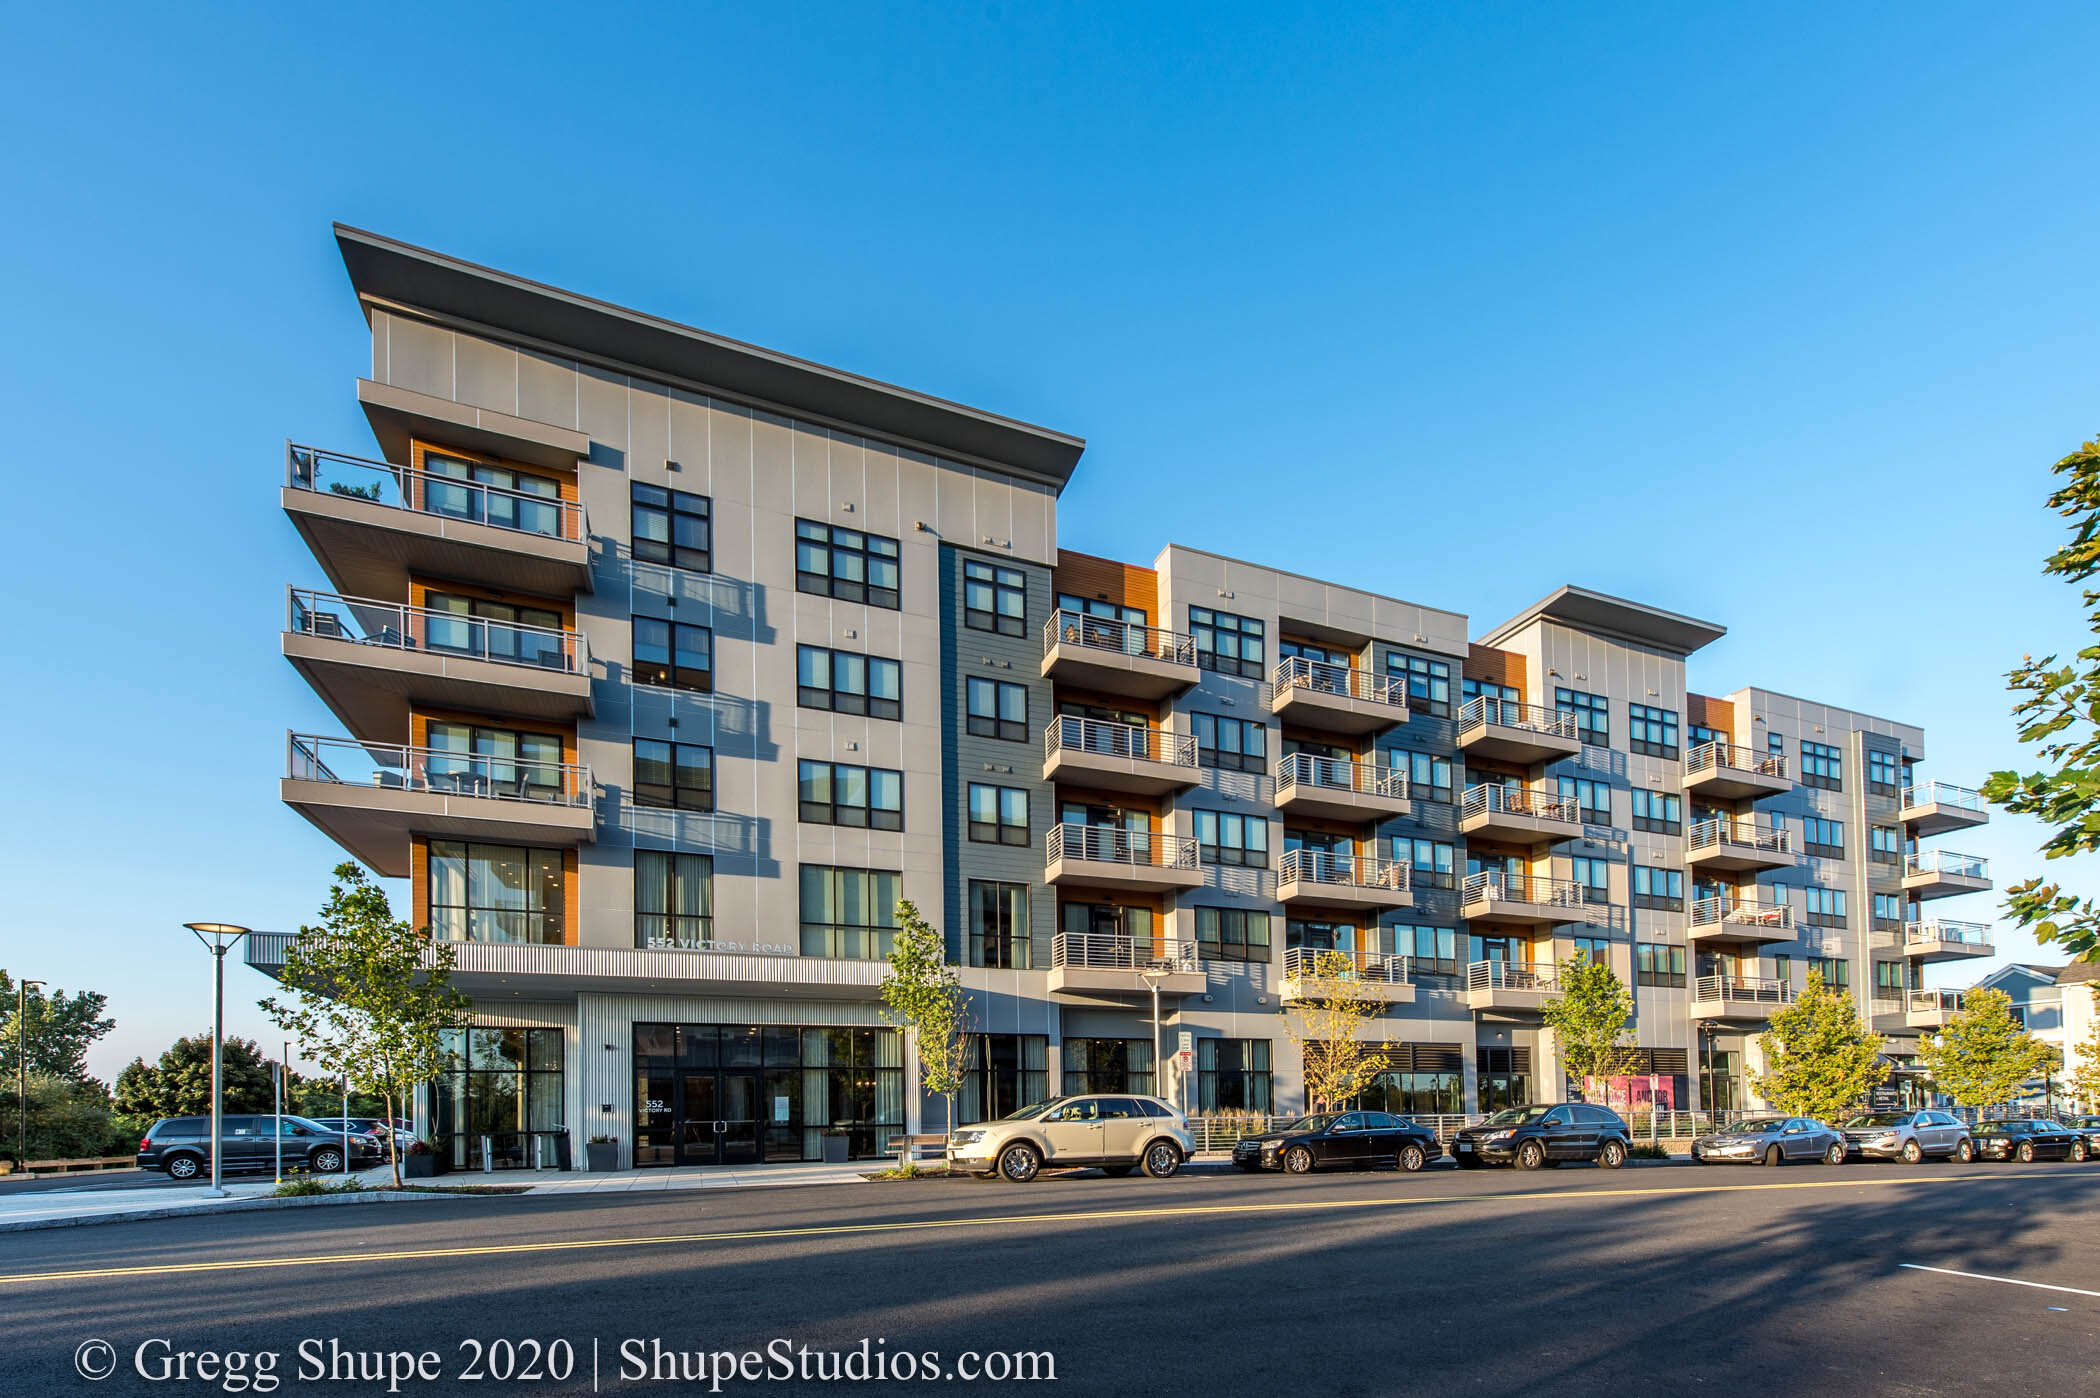
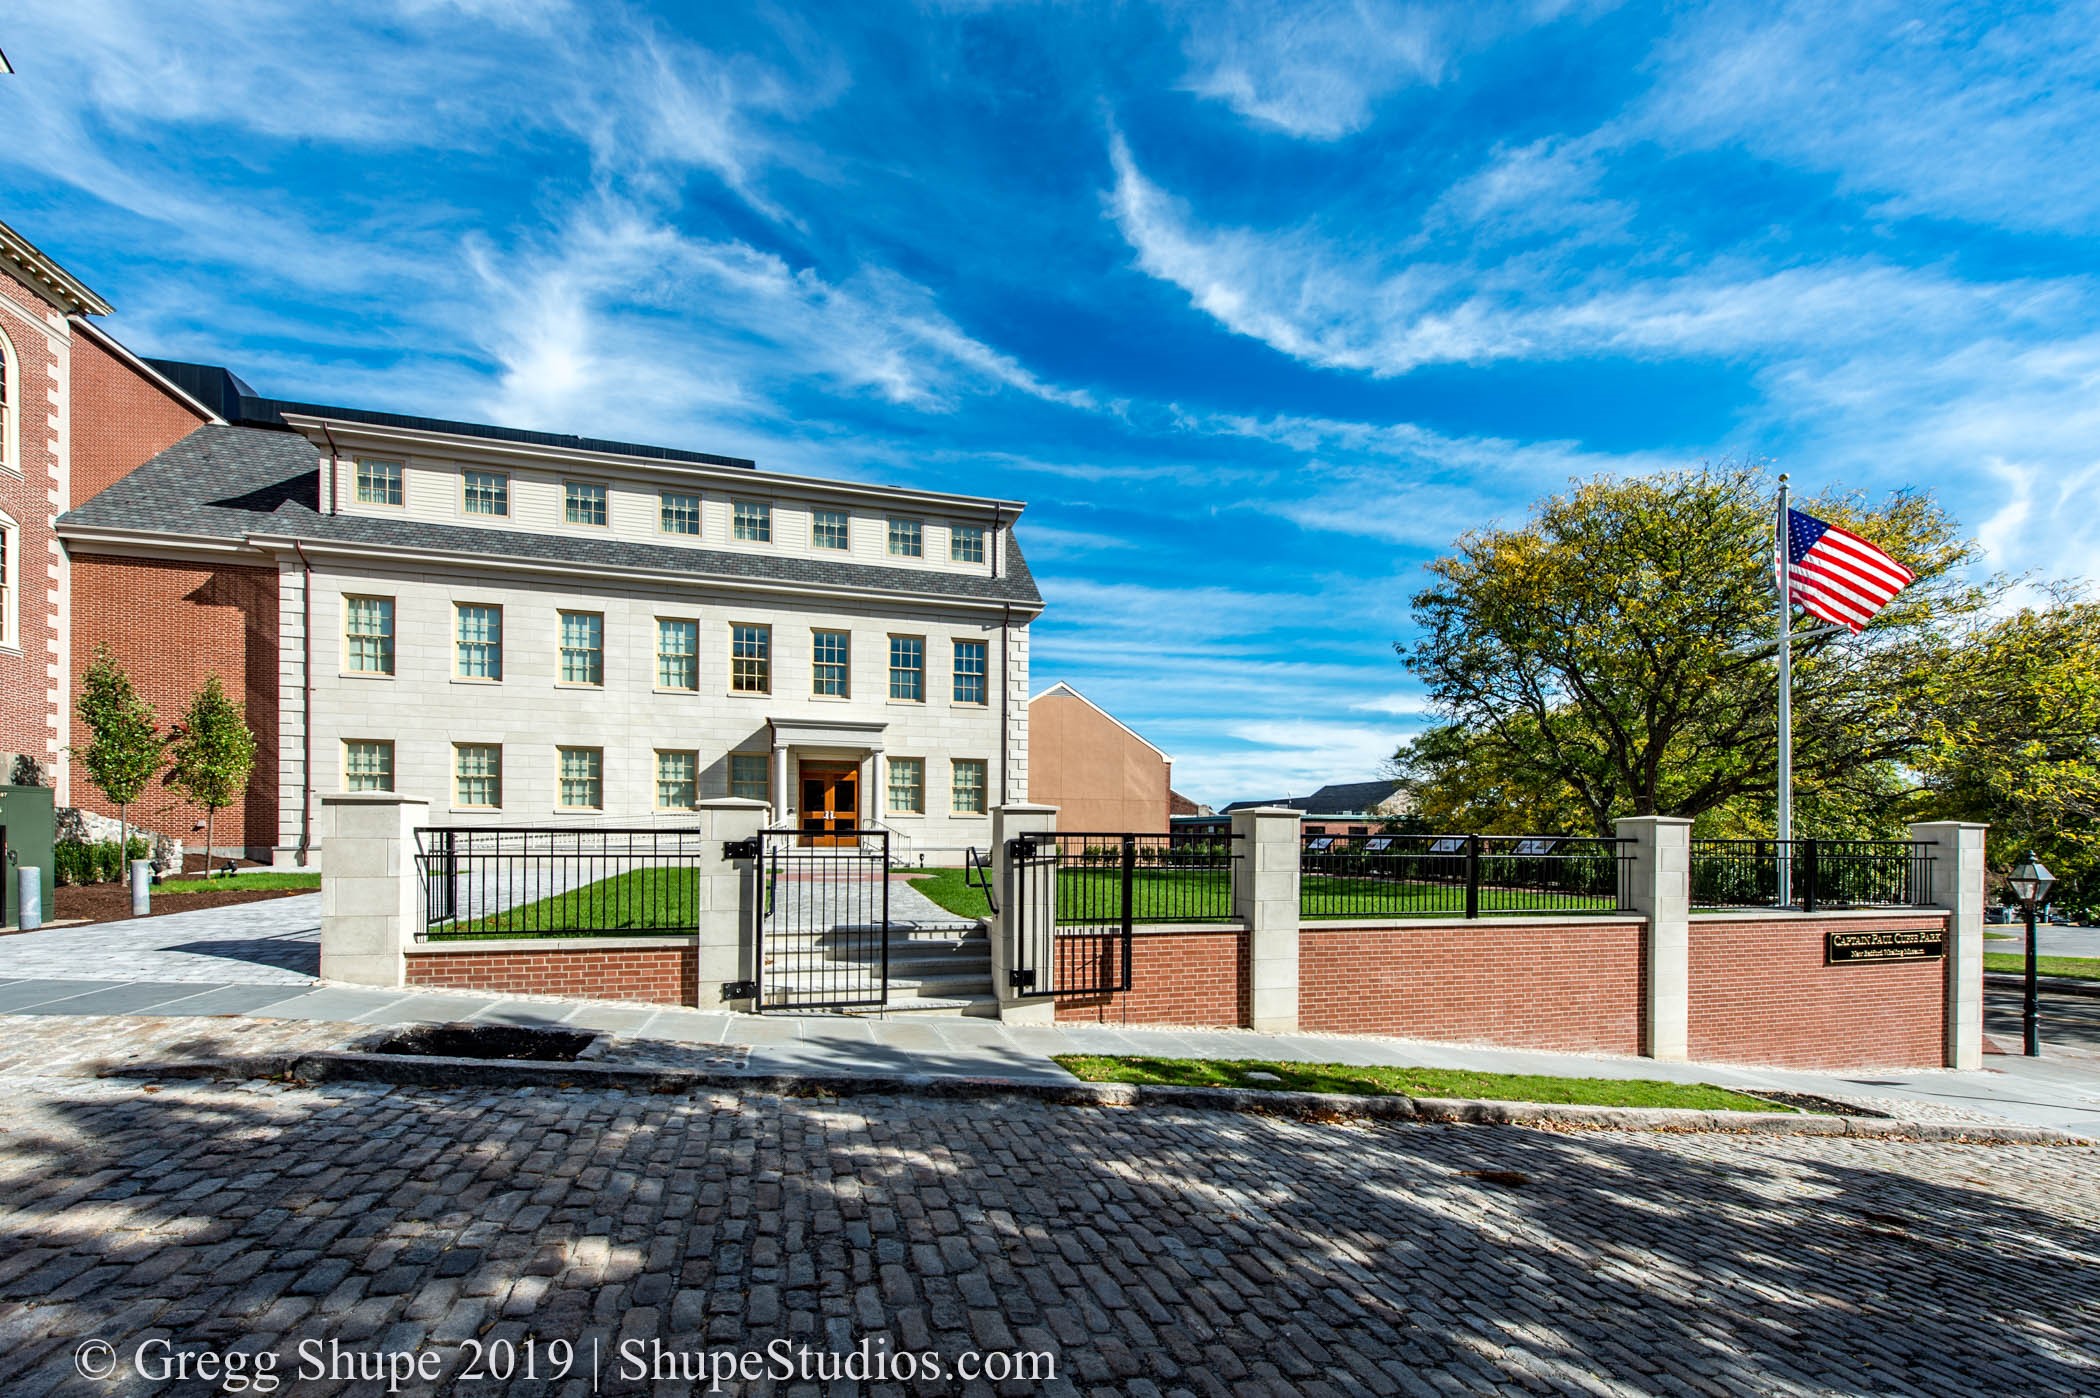
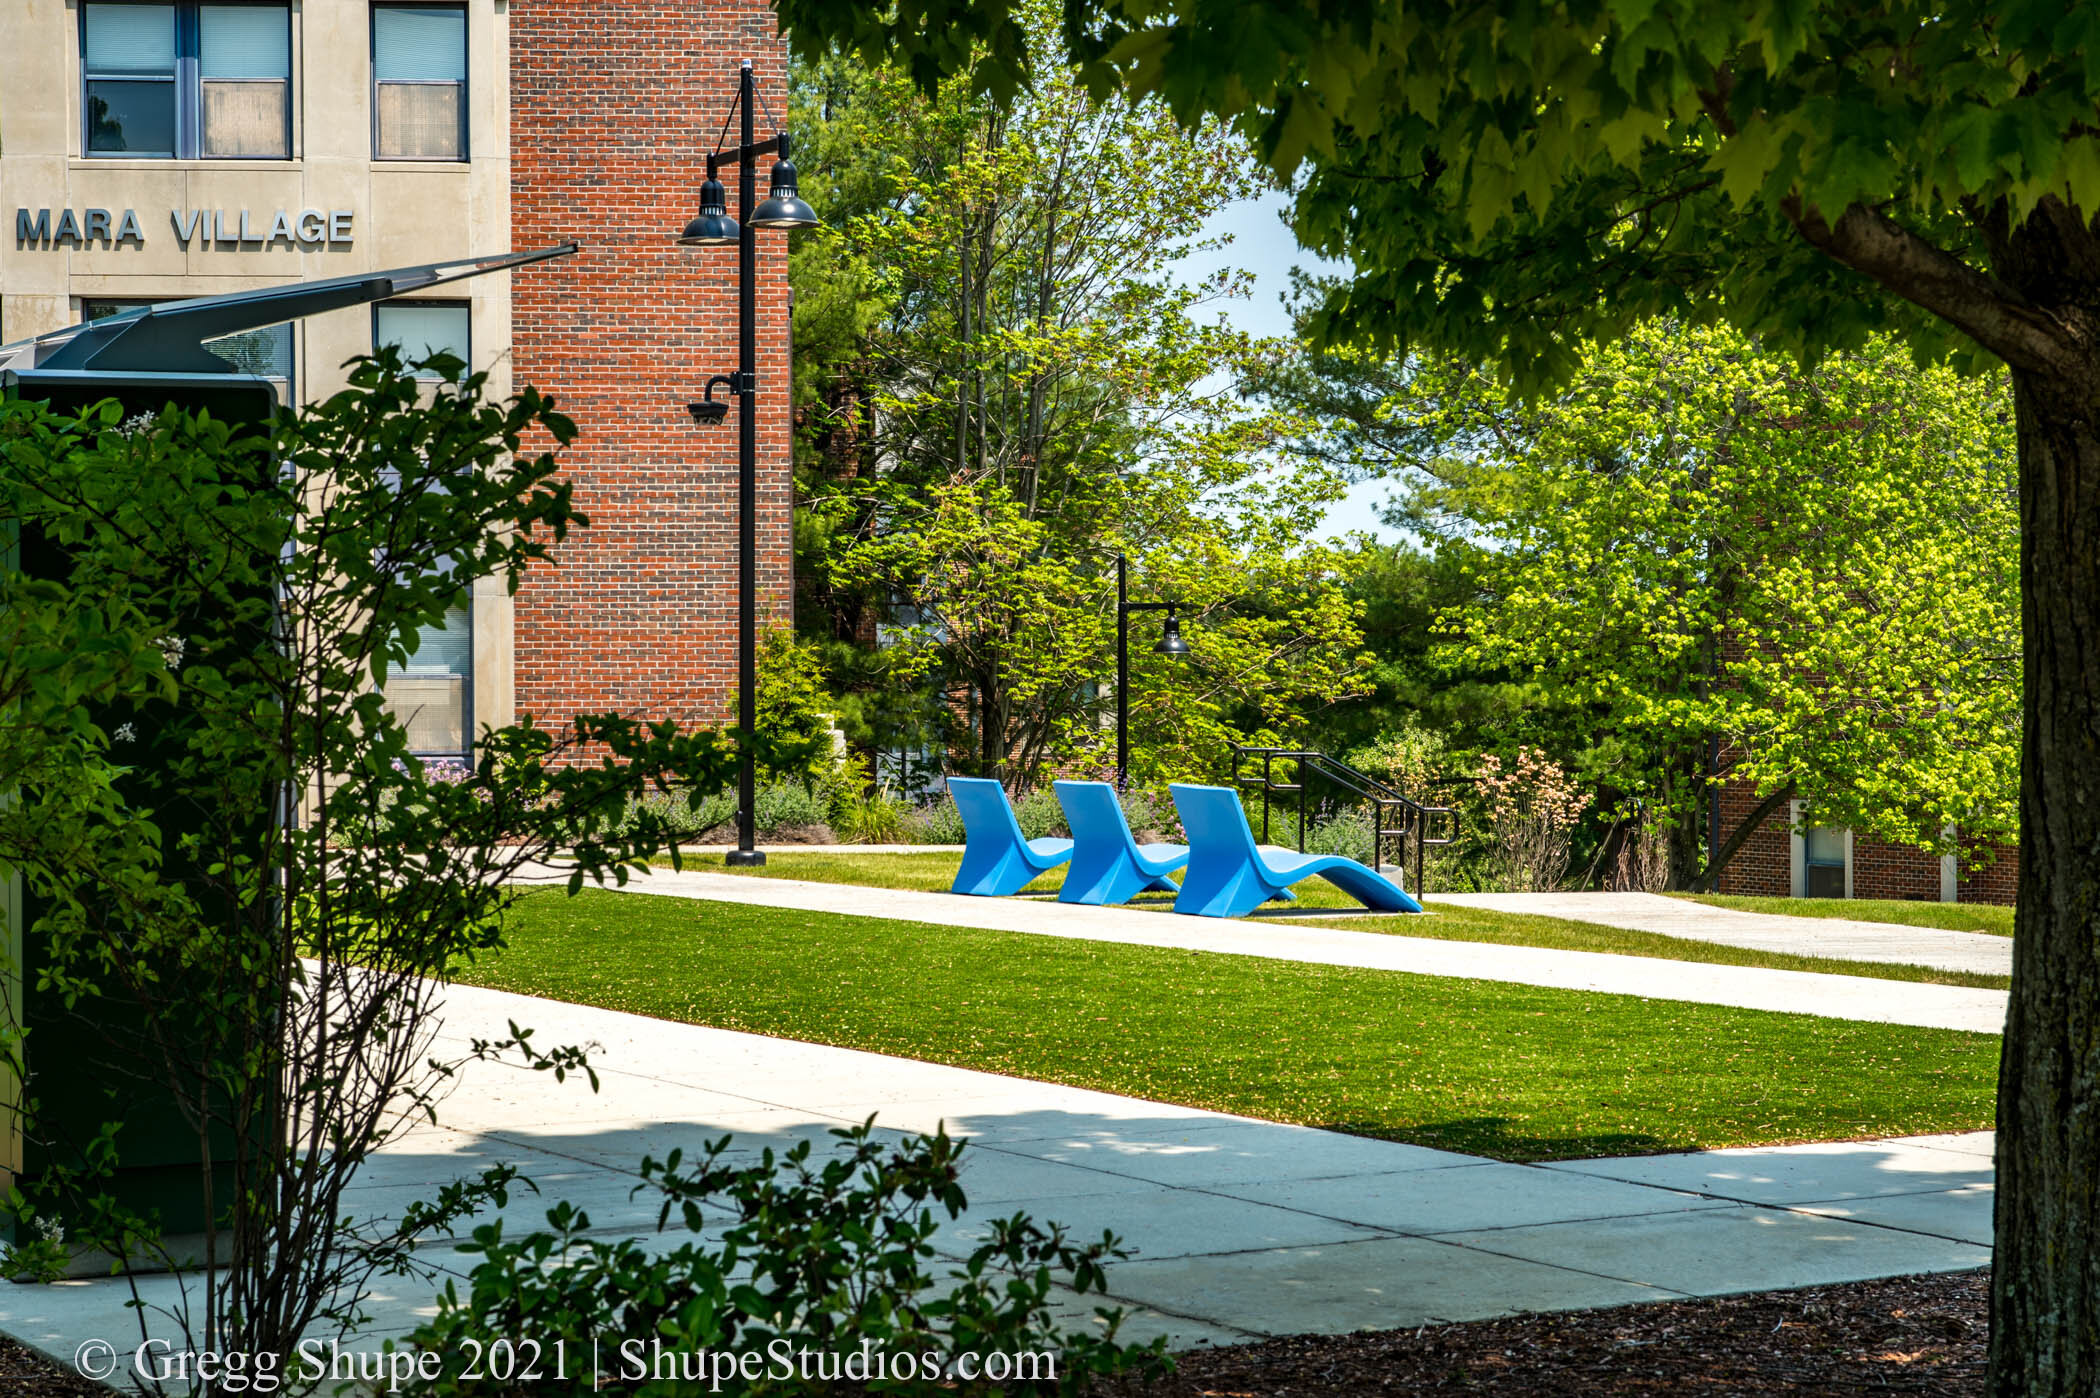
The choice of lens is critical to success, too narrow and you lose the room’s personality, too wide and you get distortion. My go-to architectural lens is the widest without producing distortion in a given setting. I like to think of it as a grand view.  Plus shooting as wide as possible allows a good graphic designer to crop in and adjust the shot. Alternatively, using a longer lens, and cropping in is a great technique to showcase a key architectural element. Using this same technique in a very large space provides another option by telegraphing to the viewer that it is a sizeable room.

Lighting

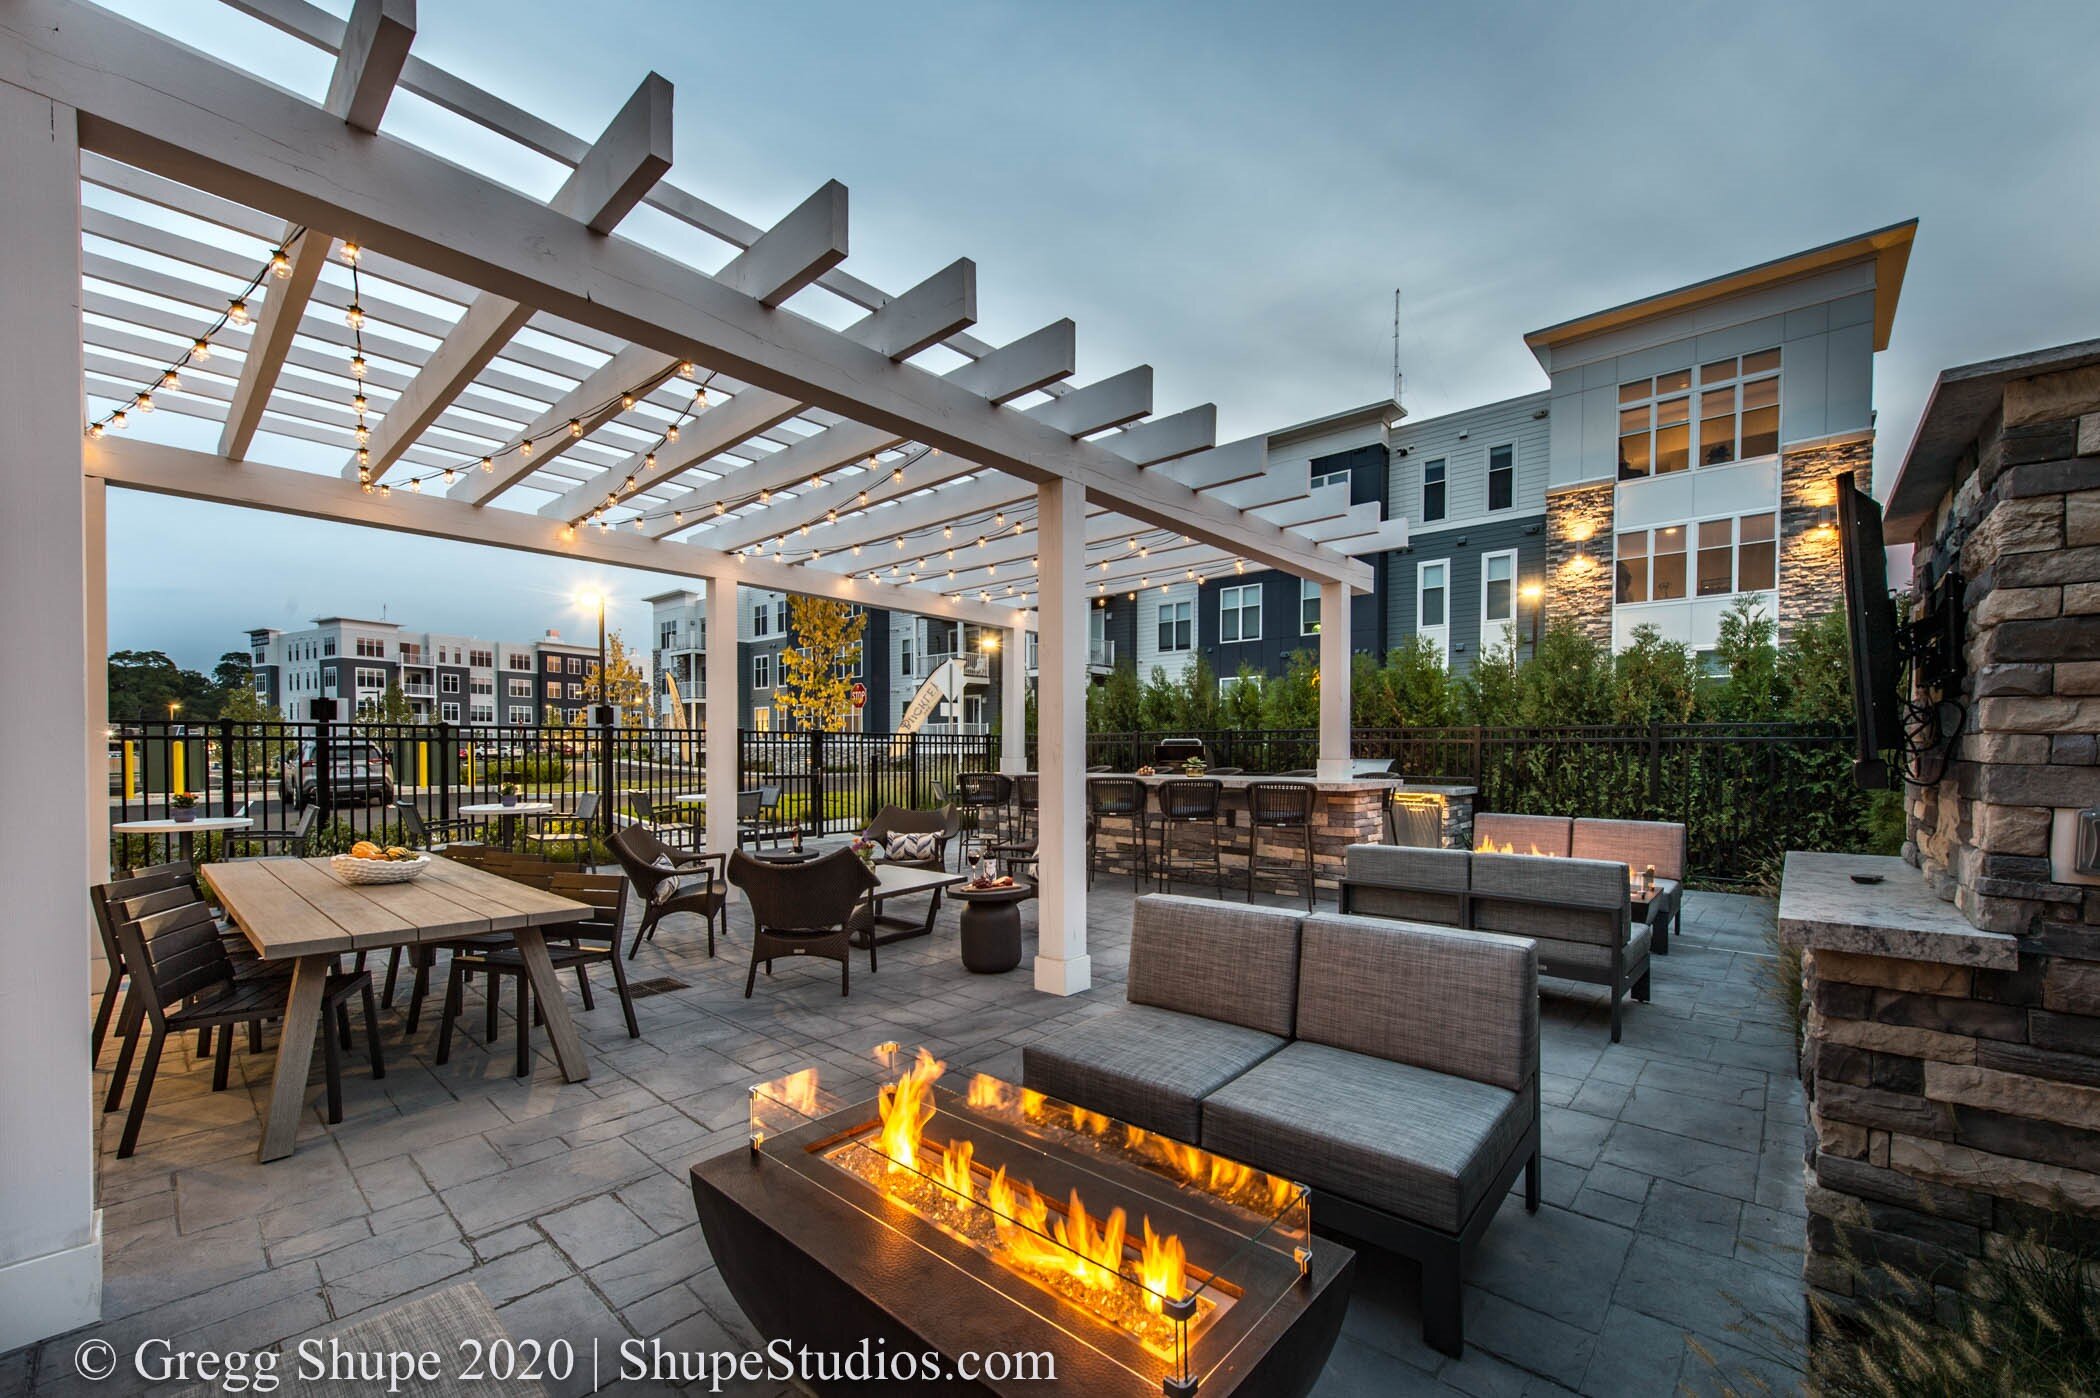
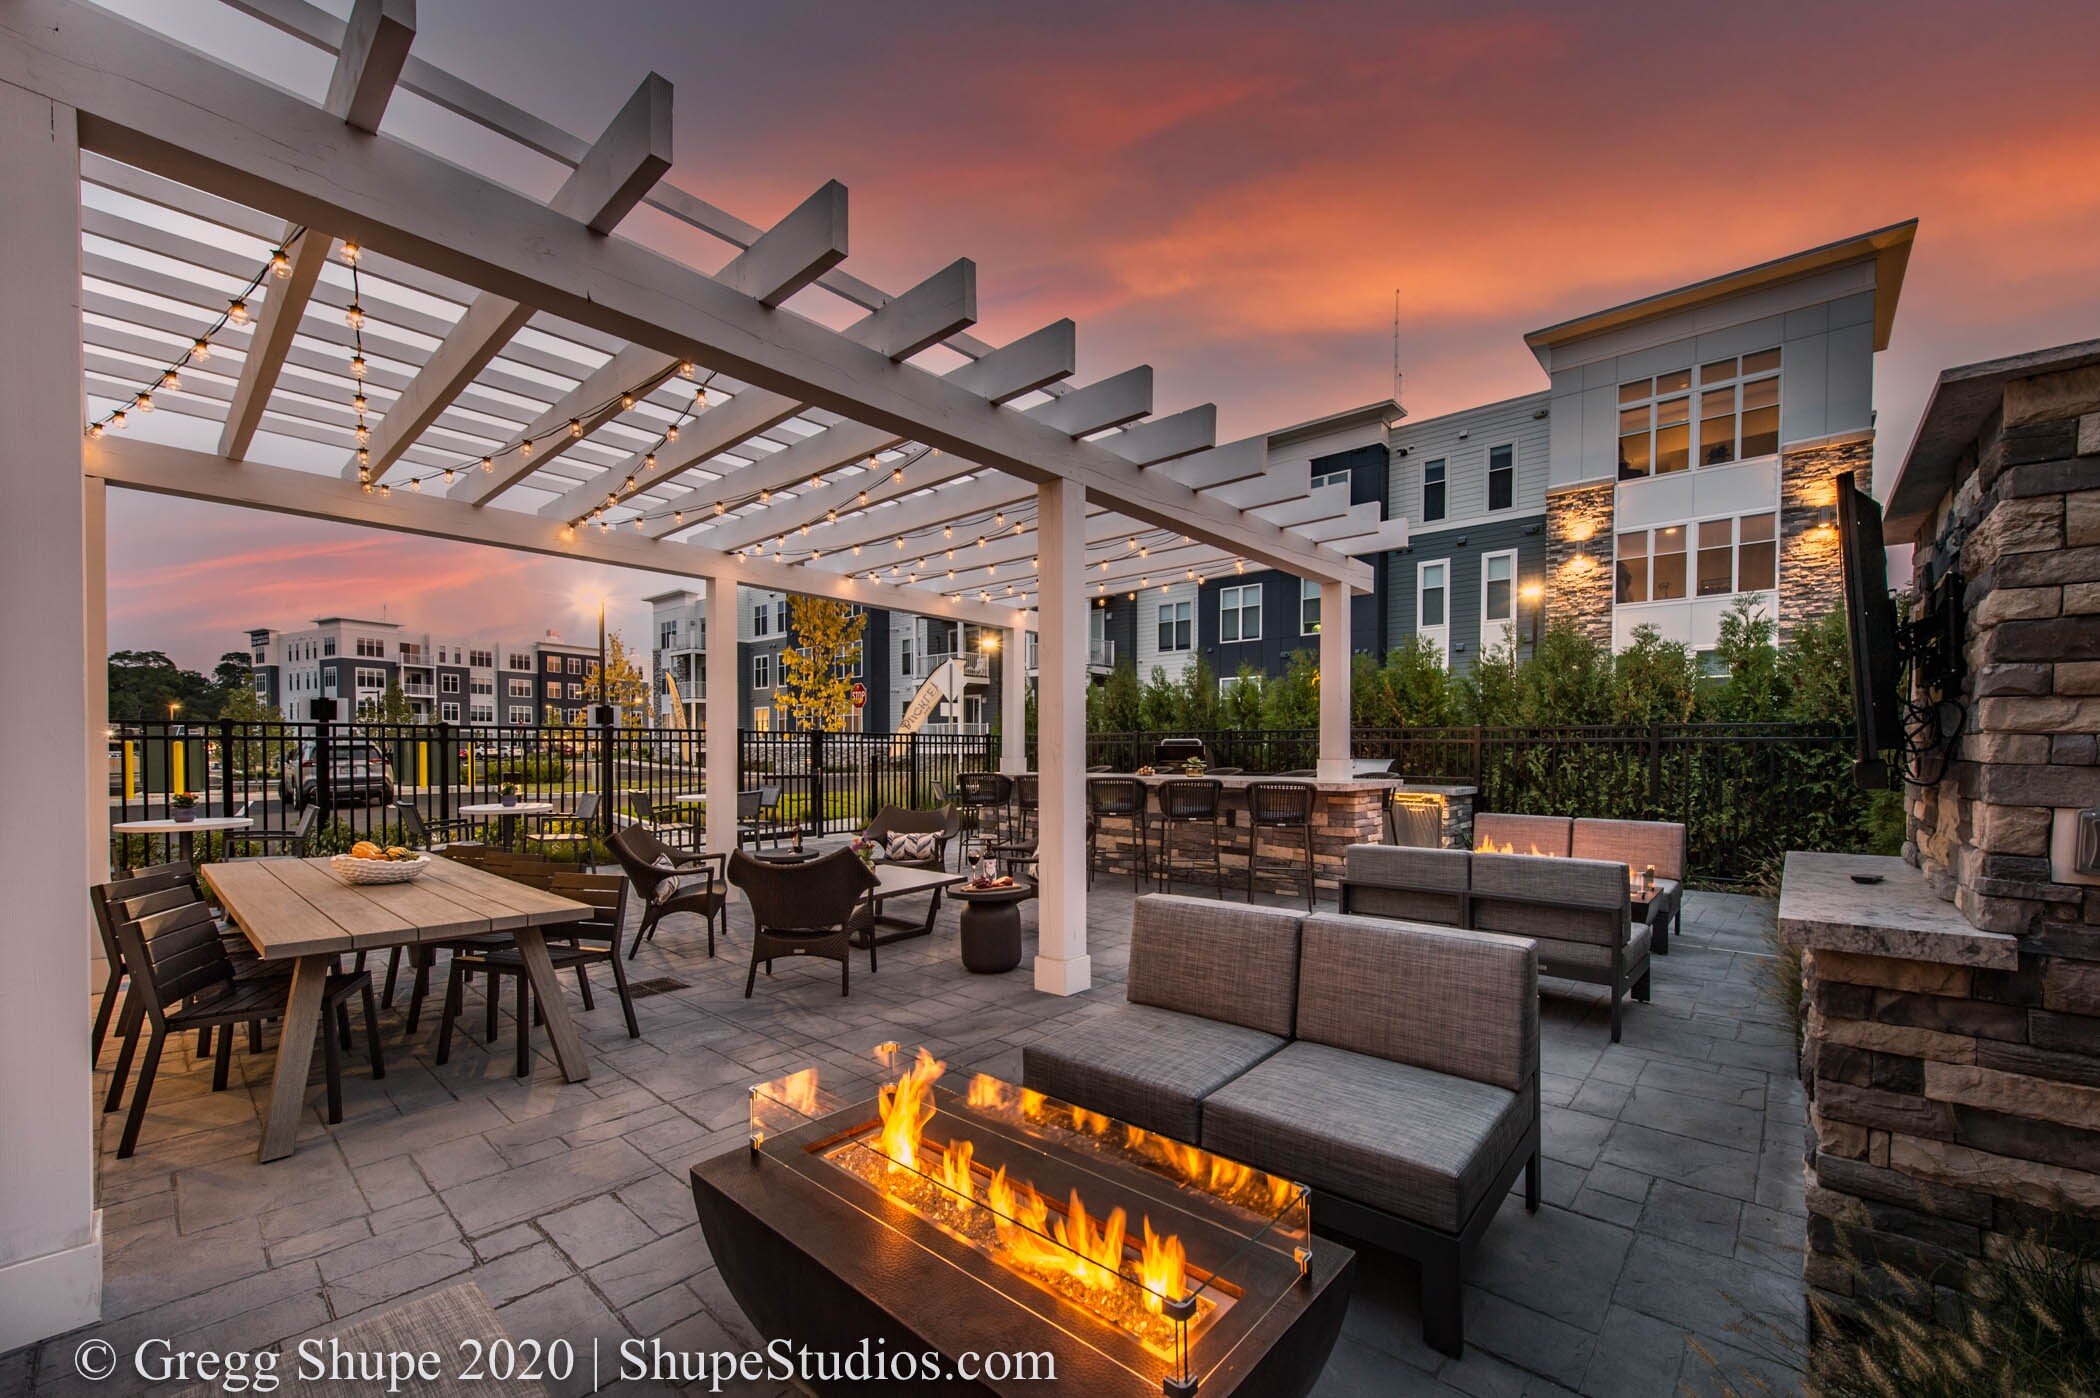
More often than not I need to supplement or adjust the ambient light in a room to fill shadows, even out the light, or create focal points.  To the extent possible I try to balance lighting sources so I don’t have conflicting color temperatures throughout a room, or if I do, I control them to enhance and add drama to the shot. Color temperature is measured in Kelvin (K), with three common ranges: Warm Light (2700K-3000K); Cool White (3000K-5000K), and Daylight (5000K-6500K).

Windows

Windows are an important architectural element in any room with exterior walls. However, properly lighting the room often means that windows are completely blown out – especially if you are shooting directly toward them. In this case I’ll take multiple shots, one with the correct settings for the room, one for the windows, then merge them in Photoshop for a perfect photo. 

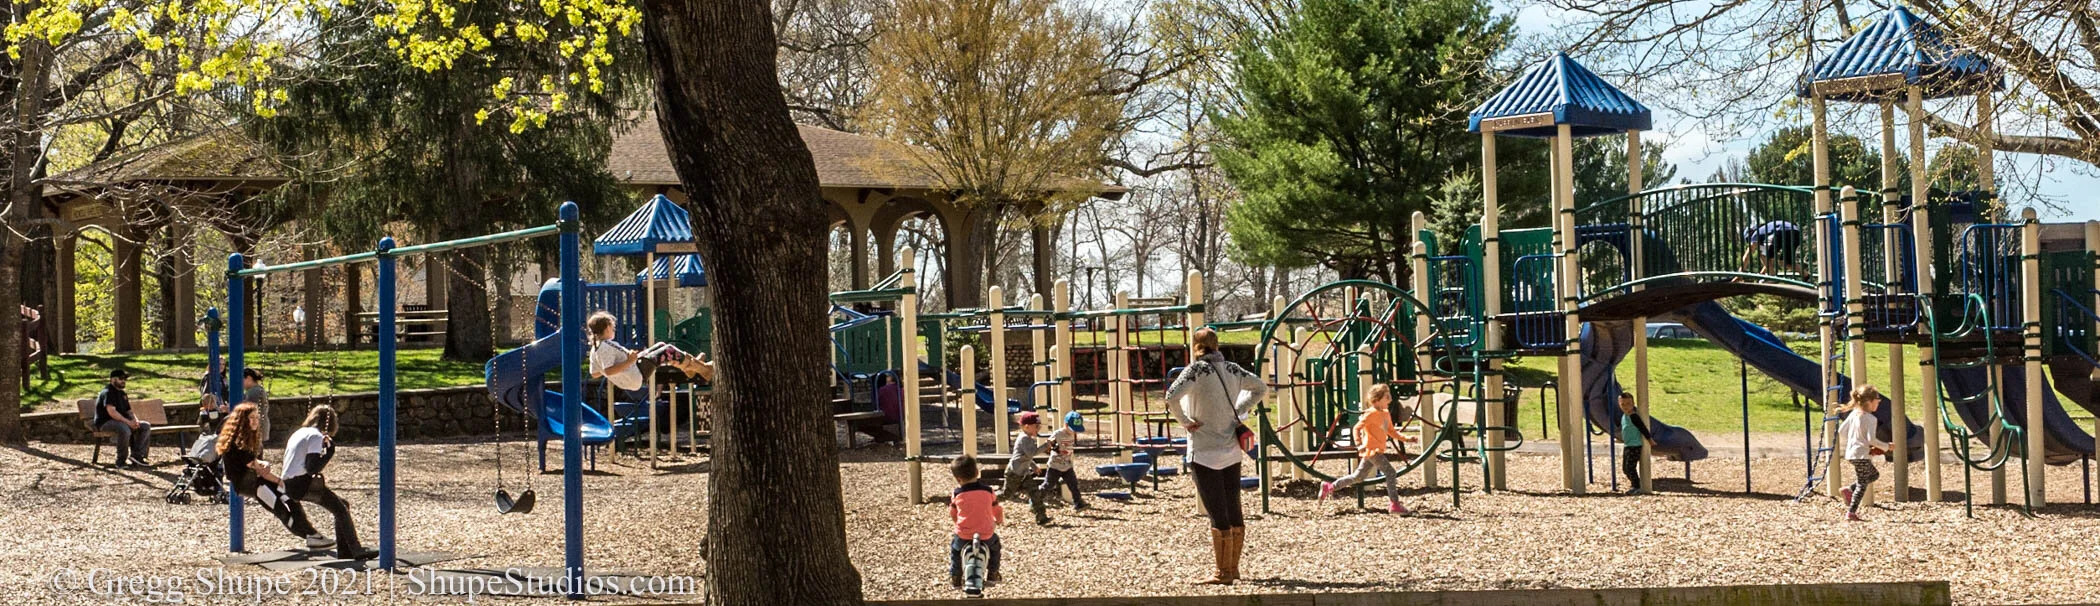
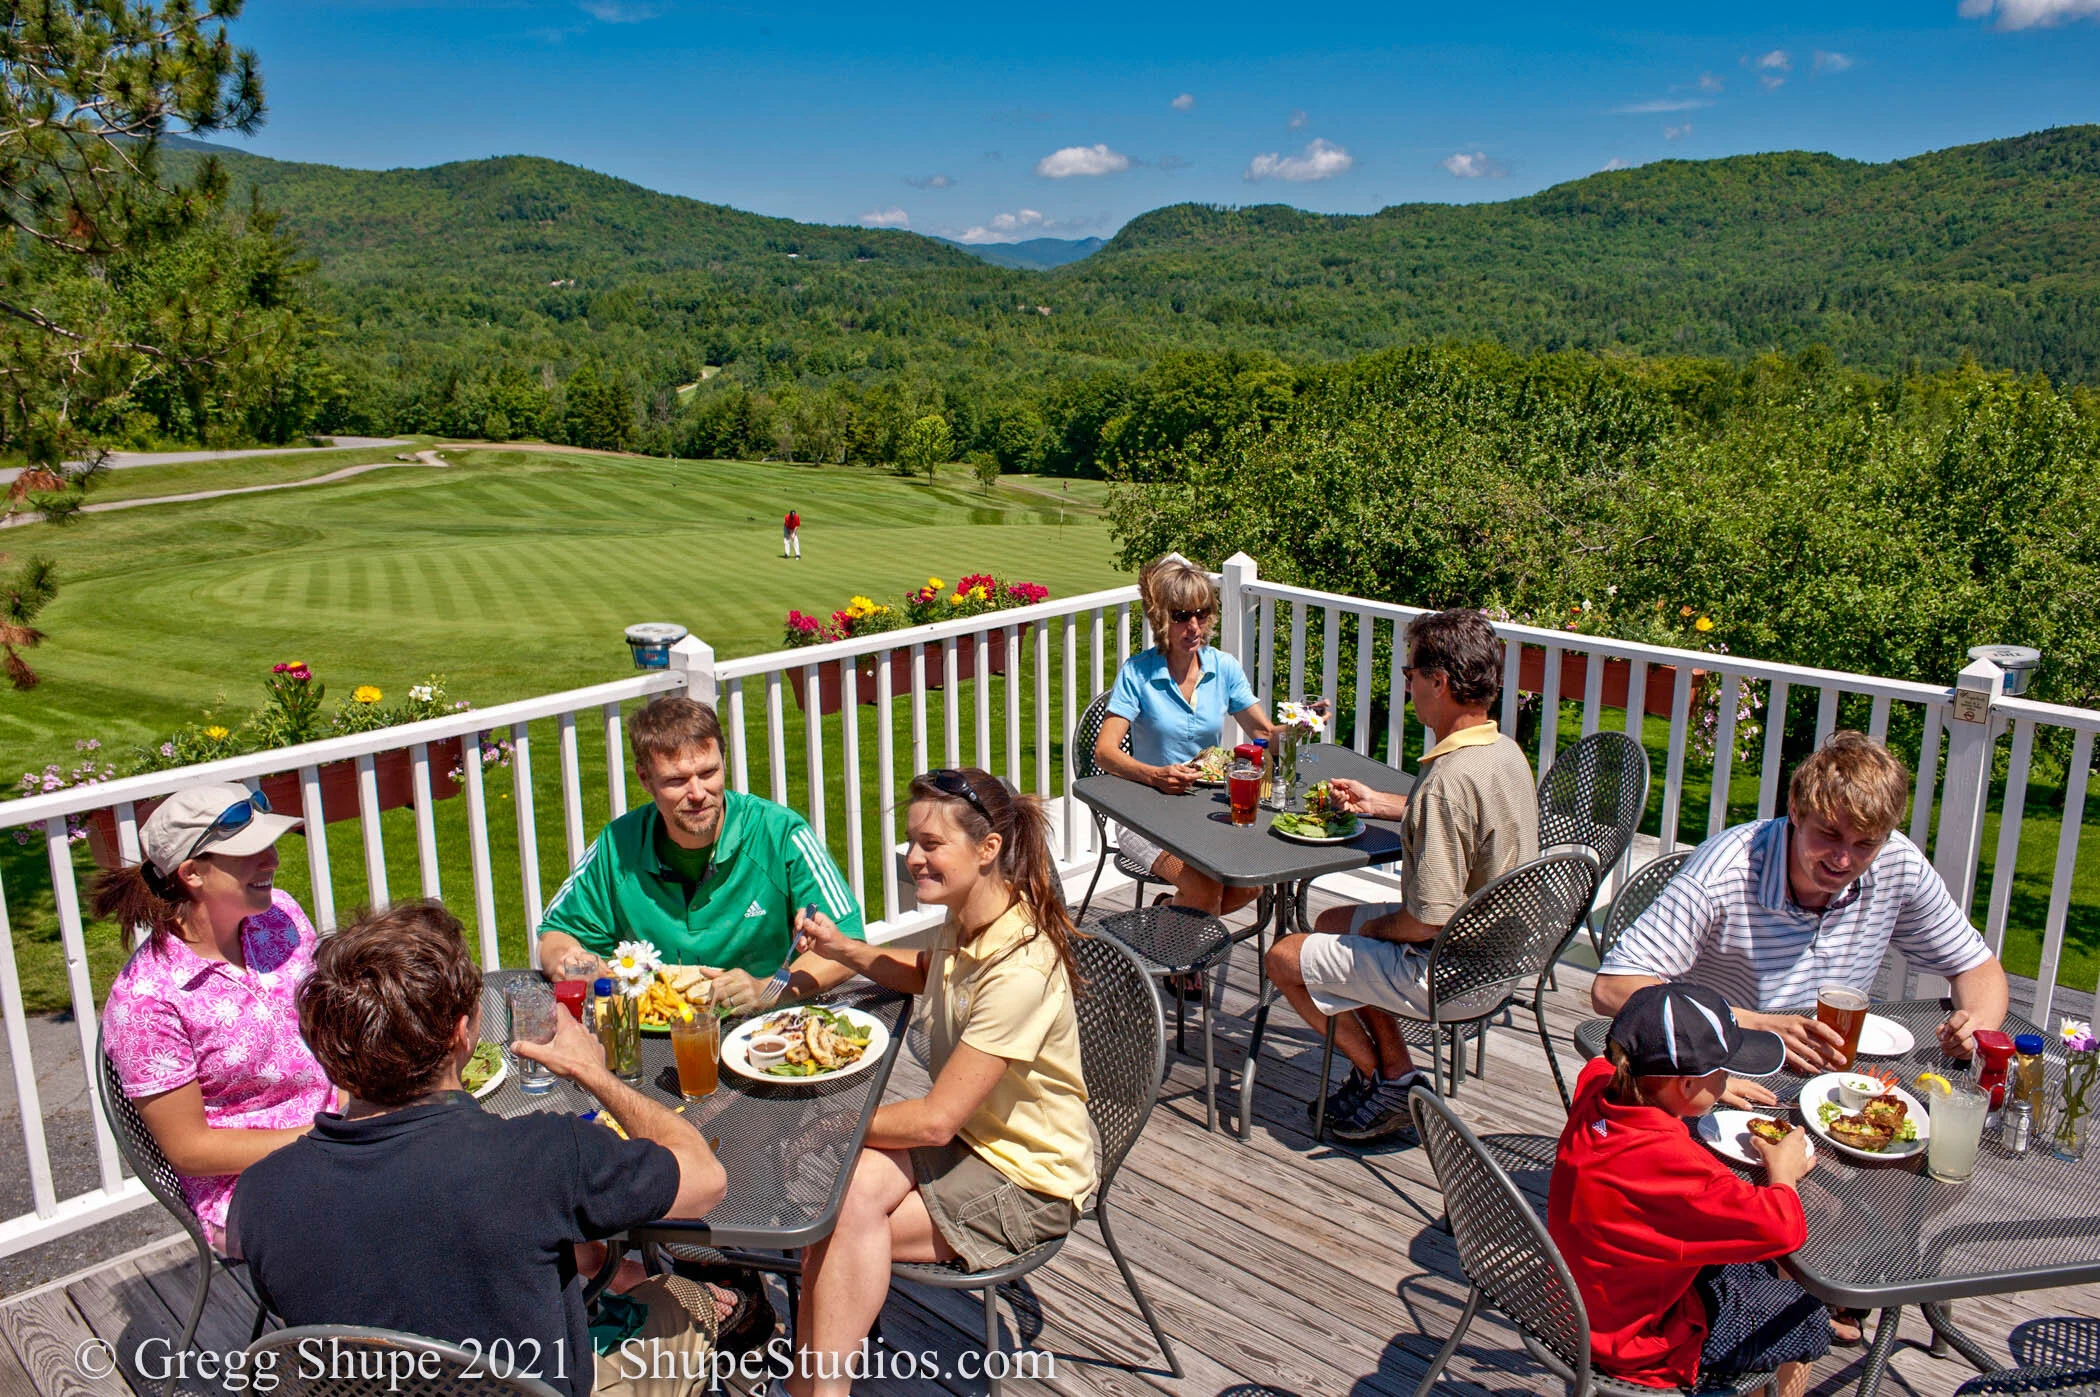
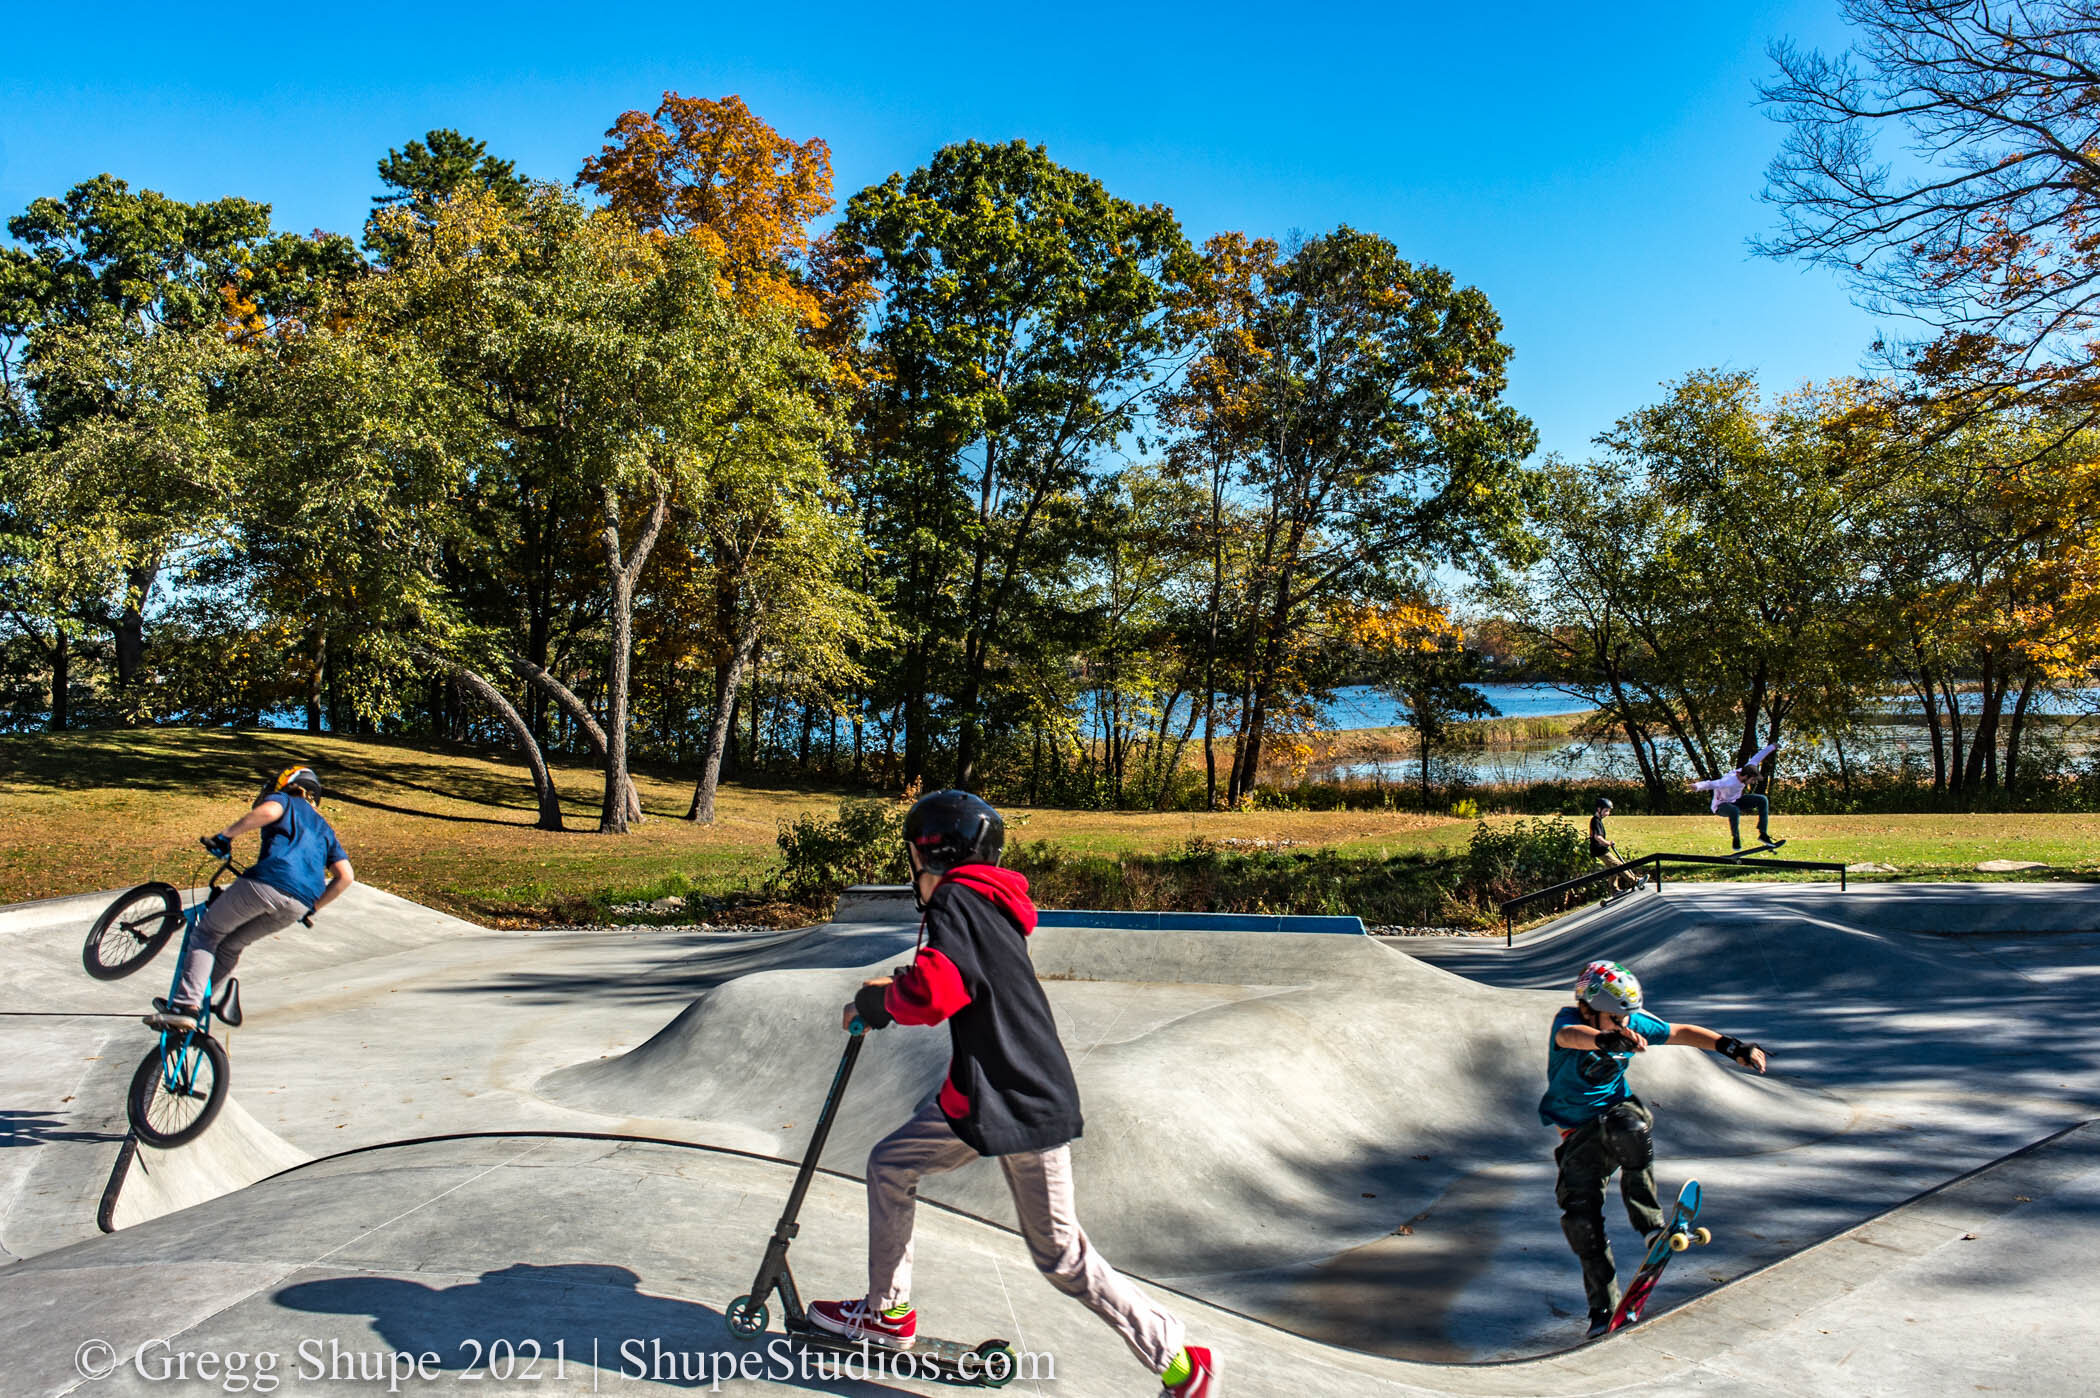
 Mix far/ near/ close-up /and detail shots in your photography

  • Many people make the mistake of taking all their photos from the same distance

  • For a given property it is best to photograph it the way people will experience it – from afar, in intimate detail, and anywhere in between

  • The effect of mixing shots significantly enhances a portfolio or spread

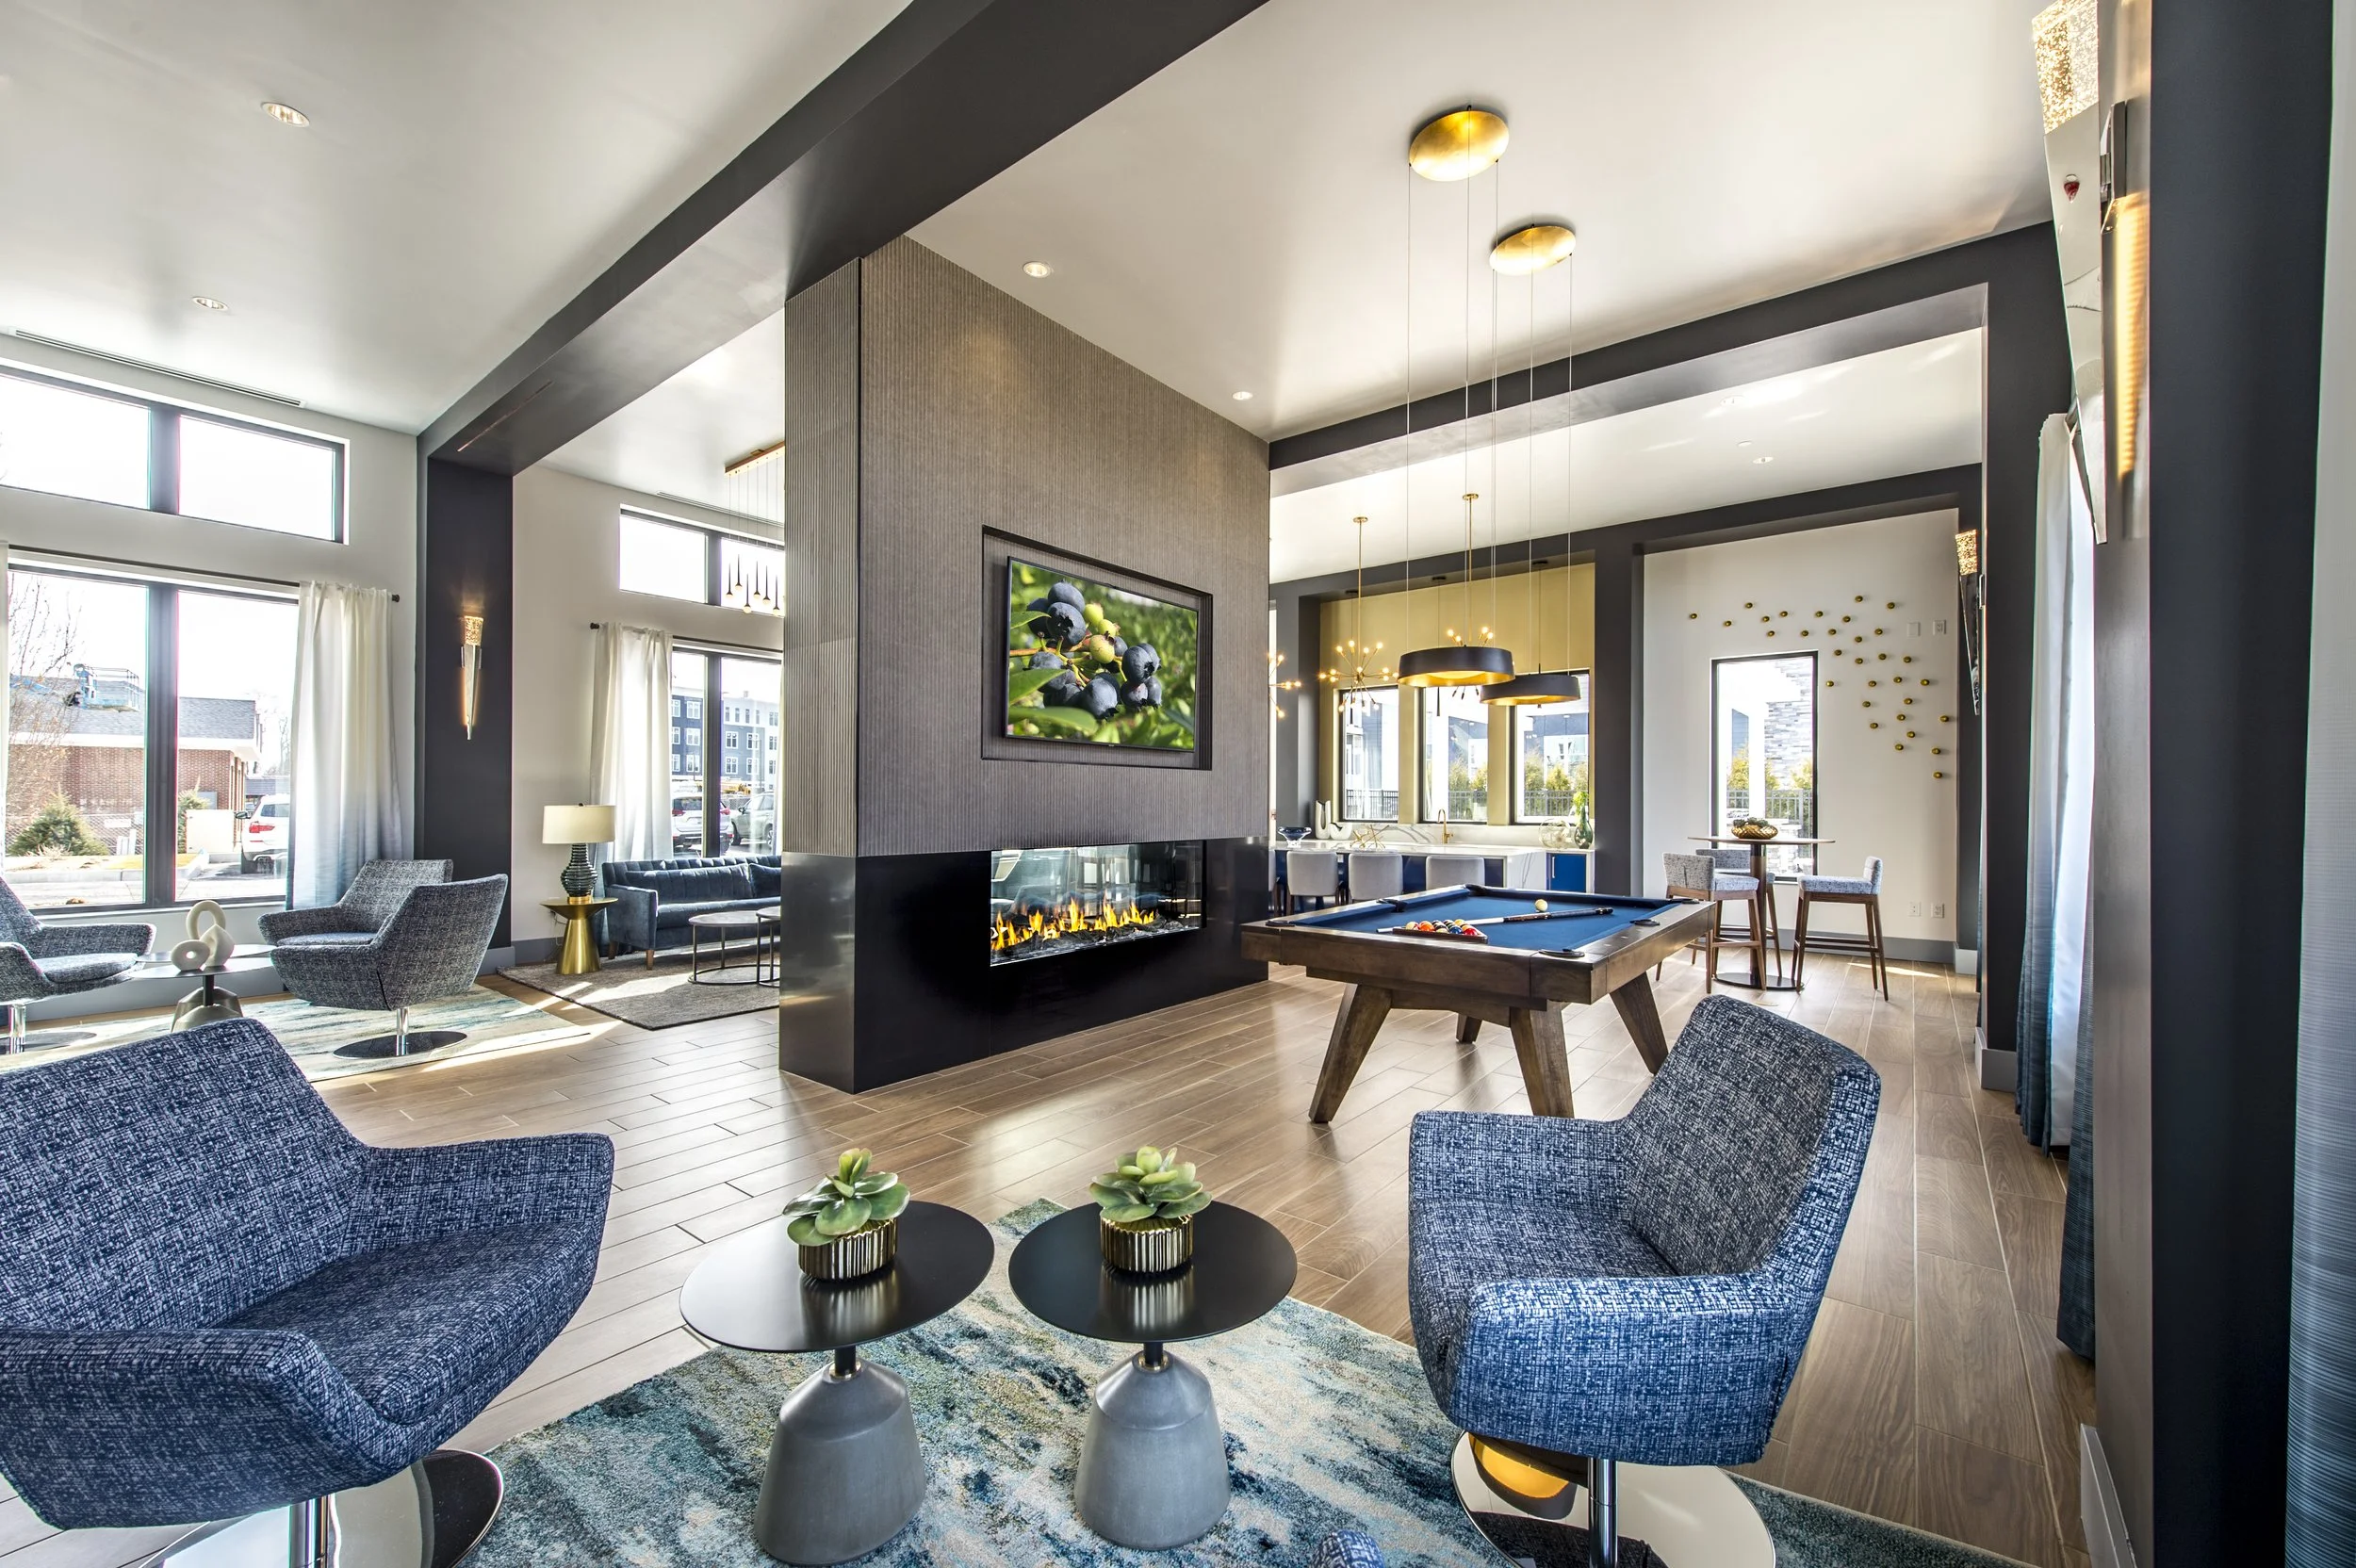
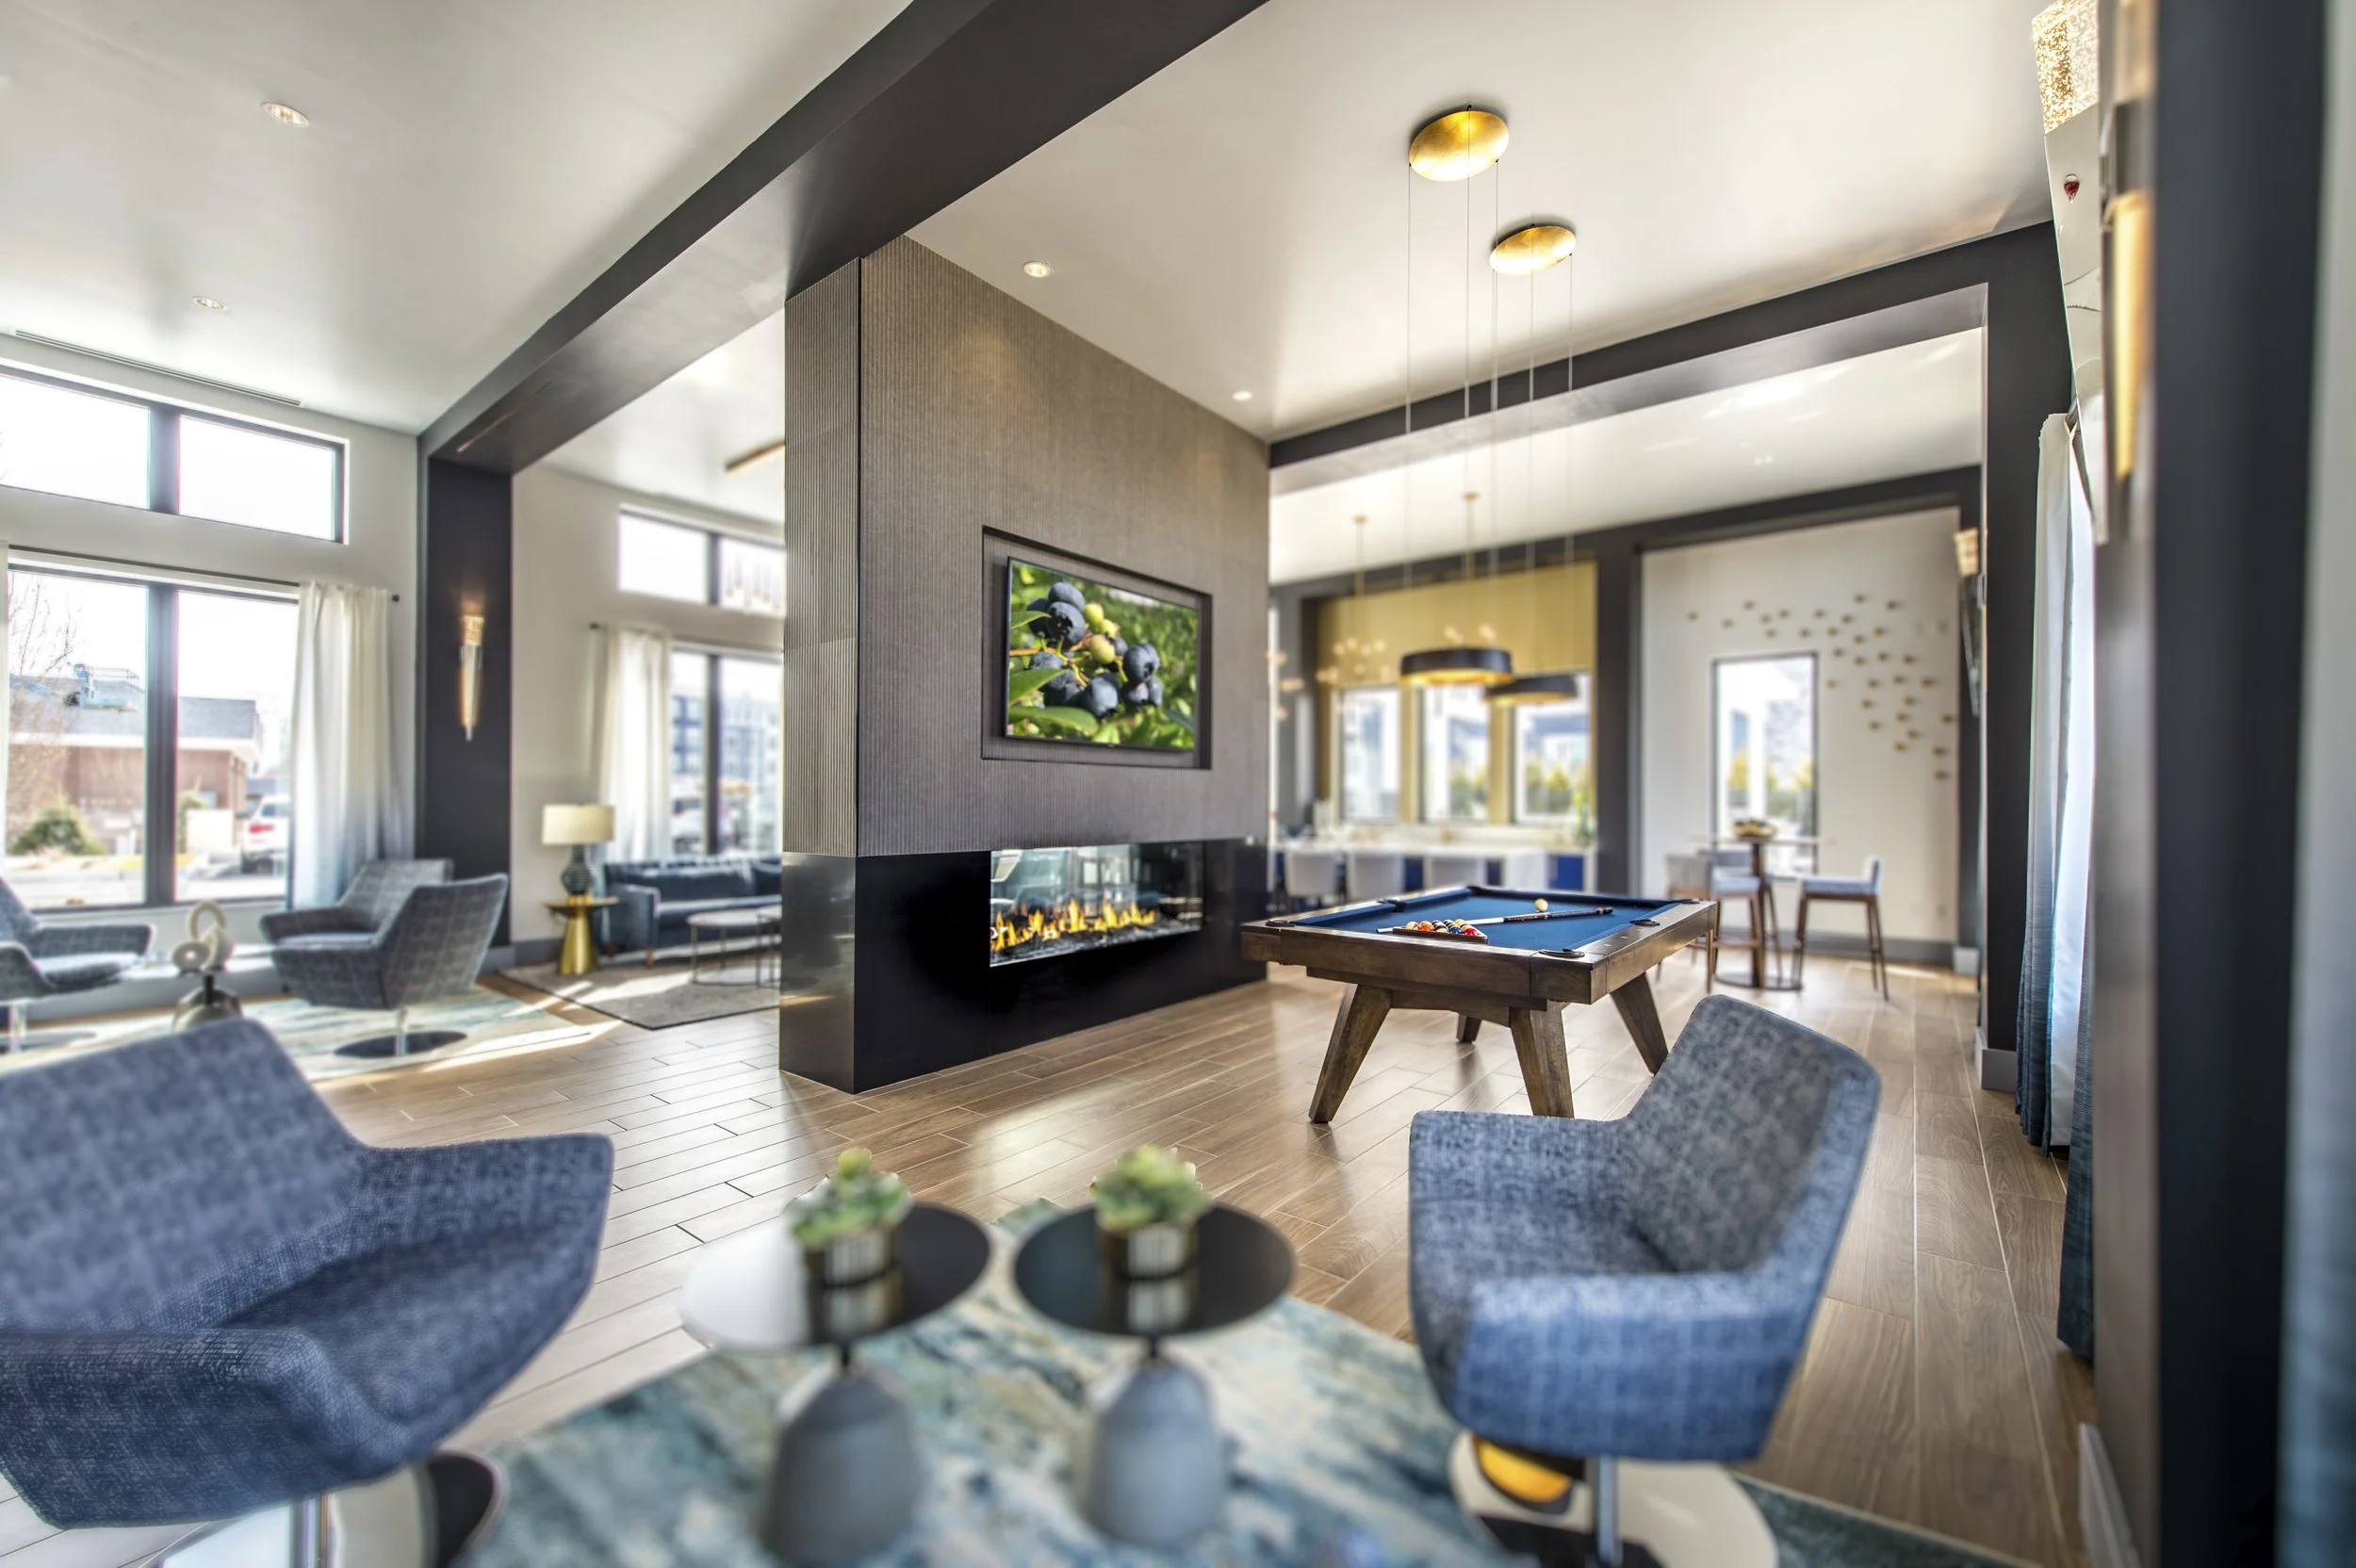
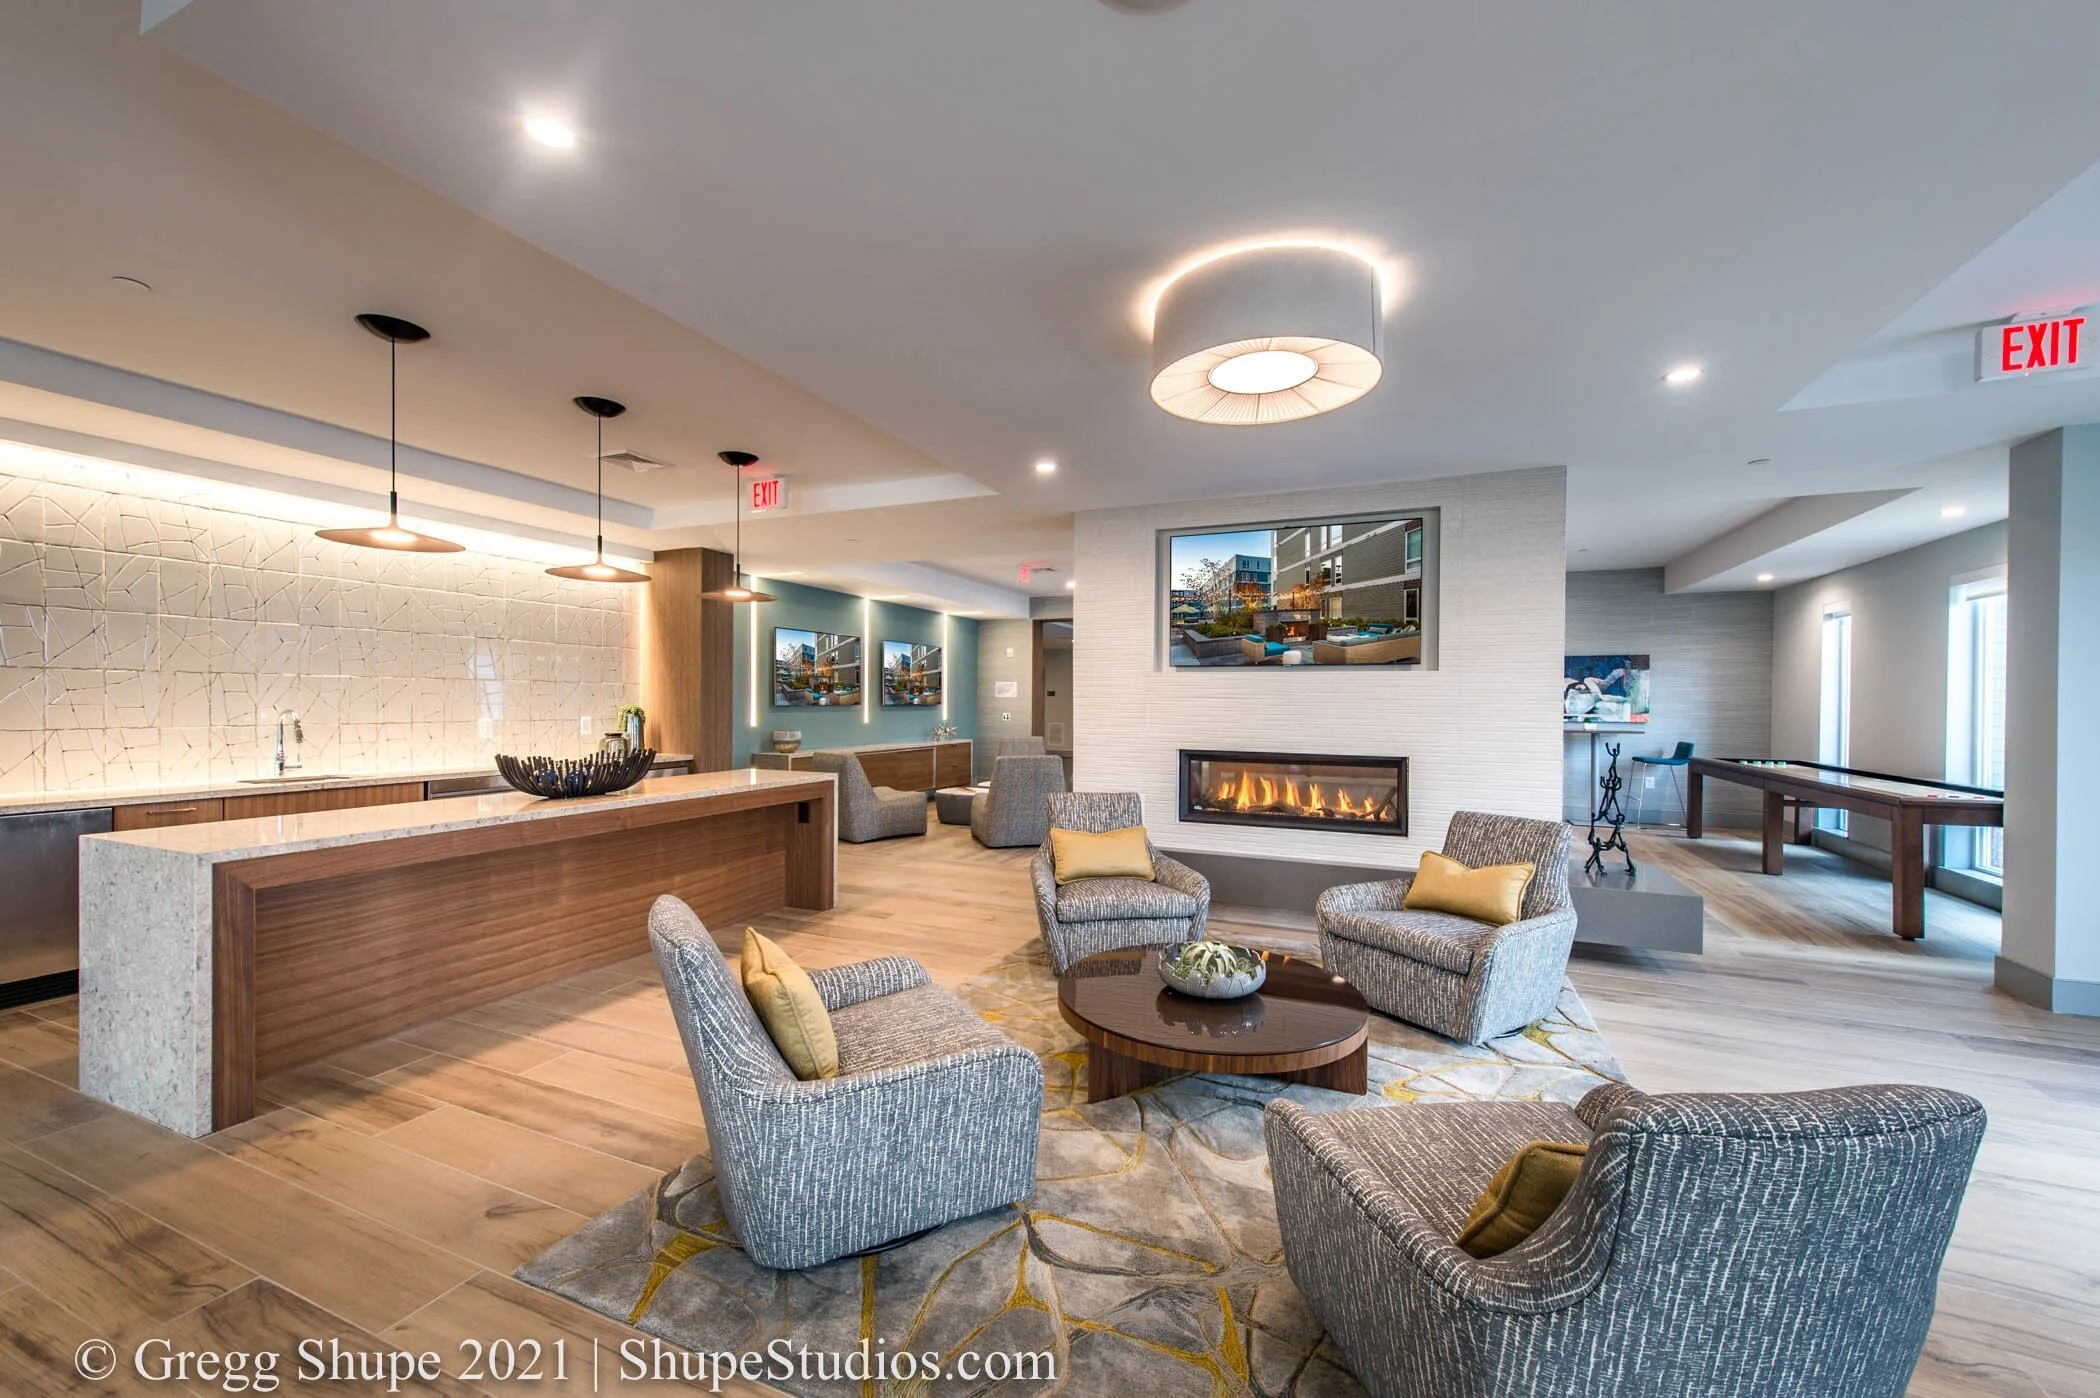
Experience the Room the Way a Person Does

In the following three shots notice how I am photographing the room as someone would experience it. First as you would see it in its entirety when walking in, then from a mid-distance having entered the room, and lastly in a more intimate setting in front of the fire and TV.

In the first two pictures below notice the bluer light coming from the windows and the warmer light on the interior of the room. Lastly notice the drama the lens provides to the far and mid-distance shots. There is clearly a distortion but here it adds a nice effect, in particular interesting angles on the ceiling.

shupe 1.jpg
shupe1a.jpg
shupe1c.jpg

Detail Shots

Detail shots provide a nice complement within a series of images. Notice the simplicity of these shots - just enough staging but not too much. Also take notice of lighting. The lower K temperatures in the first image creates a warmer calming mood while the bluer higher K temperature in the second creates energy and a more contemporary vibe.

shupe 2.jpg
shupe4.jpg

Interplay of Light

Here various lighting sources enhance the architectural elements of this unique wall feature. Warmer artificial light from above meets the daylight cast from windows below to create an interesting color gradient. The various lighting sources make for an interesting array of shadows and add depth.

shupe5.jpg

Composing the Vantage Point

Taken from another vantage point this shot might be unremarkable. However by contrasting shapes, colors and angle we create an interesting picture that teases the viewer a bit. Are we focusing on the bike, the green tubes, the white pipes or everything? The lens creates interesting angles within the ceiling, adding drama.

shupe6.jpg

Far / Medium / Close

 These shots accentuate the size of the room and also demonstrates different vantage points going far to near. The lens accentuates the foreground in the first adding stature and gravitas to the room. We also have the vantage point of two rooms. As we move closer things change and the setting becomes increasingly more intimate.

shupe7.jpg
shupe8.jpg
shupe9.jpg


Grand View with a Foreground Subject to Start the Story

This shot is simply a lot of fun. The ceiling with its myriad of shapes and angles make a somewhat dull room very interesting. The Kuka in the foreground engages the viewer -- what is it exactly and why is it there? A little staging and a keen eye take a room from good to great

shupe10.jpg

If you are an architect, builder, developer, or business owner wanting to showcase your space our expertise with interior architectural photography takes buildings from good to great. I’ll hold a walk-through with you to understand your objectives, make suggestions, plan out the shoot and then provide photography that wows your audience. Every building has a story – let us help tell yours.

Think I can wow you? If you’re in the Boston area or greater New England, I hope you’ll reach out to me at Shupe Studios.

Why Museums Need Architectural Photography

Why Museums Need Architectural Photography

In many ways, the exteriors and interiors of museums are the unsung heroes. While people are drawn to exhibits and artwork that museums showcase, the amount of time and detail put into the museums themselves, from enhancing the experience from how it’s presented on display and in the room, to the historical and cultural significance of the museum itself, this is something to be proud of and show off. This is where architectural photography comes in.

Read More

Photoshop Technology Just Got a Lot Better

I make it a point to keep up with the latest technology and incorporate it into my workflow. It makes a world of difference in the quality of the end product I provide to my clients and the results they achieve in their marketing efforts.

As a case in point, although I can’t control the weather on shooting days (yet) technology allows me to do the next best thing.

A while back I had a shoot scheduled for an apartment complex patio at twilight. The day was clear and beautiful until an hour before the shoot. As we prepared, including a lot of lifestyle staging, the sky became overcast and dull. I was able to edit the shot in Adobe Photoshop and after a lot of work provided the picture on the right to my client, a big improvement.

shupe studios photo editing

However, that was before the latest updates from Adobe Photoshop. With advanced technology I get a superior result in less than half the time.  Take a look at that original photoshoot and what I was able to do in minutes with new technology.

Before

Shupe Studios before image


After

Shupe Studios with Photoshop Editing

  Here is another example

Shupe Studios - Photoshopping in a new sky

If you notice not only did I change the sky, I automatically filled holes in the trees, plus adjusted the overall color and feel of the building to match the new warm tones of the sunset. With my library of skies I can find the perfect option for any situation plus I can do it quickly and efficiently. A better photo at less cost is music to my client’s ears and great for me too because I deliver a better end product.

 Good to Great

Below are two other projects from this month. In the first case my client wanted to showcase their newly designed roundabout. We had the picture but my client wanted to show its use by multiple residents, both large and small, on multiple types of vehicles. Presto - more people on bicycles, and a pickup with a trailer. It would have taken hours to get those included during the shoot but we did it in minutes in our studio. You will also notice other enhancements – a brighter day, a nicer sky, better foliage, new grass, and colors that pop.

Shupe Studios - photo enhancement

In the shot below we see a similar situation but indoors. As above, we took a shot from good to great. They wanted the TV turned on and lots of little distracting items removed like emergency lights, fire alarms, and ceiling fixtures…plus we added a little pop to the color.

Shupe Studios - Indoor photography

It used to be that we took what mother nature gave us or an interior shot simply was what it was. Sometimes it was great and other times not. However, using the latest technology we are able to modify and perfect pictures to levels unimaginable a few years ago – both quickly and effectively. Advancing technology has enabled us to provide a better product in less time, with less cost.

If you are a Builder, Architect, Developer or Property Manager and need the best, we are here to help. Let us take your properties from good to great. Whether outdoors or inside we have the tools to create spectacular pictures on unspectacular days.

Want to learn more about Photoshop?

At its Adobe Max conference Adobe announced many new features across their platform. One of the most exciting is the ability to replace a sky as I’ve demonstrated above. For those of you who work in Photoshop and want to learn more, take a look at the following tutorial by Adobe Evangelist Terry White. The section about creating new skies begins at 4:36 – you will enjoy it: https://www.youtube.com/watch?v=5B_SErwk_JY

Rule Number 1 in Architectural Photography – Light it Right

One of the most important aspects of photography is lighting. It is true both indoors and outdoors but has particular application for architectural photography. When shooting a building most property managers assume the photographer will come out on a nice day, set up, take pictures and that is the end of it. Not quite. A commonly overlooked fact is that during the course of a day light shifts around a building and therefore to do it right so must the photographer.

Some shoot all sides of a building at the same time but there is a big downside. Photographing all sides at once means one side may look great but the rest can be sub-par. Take an east/west facing building – a morning shot of the front will be bathed in light but leaves the back in shadows. Retouching and Photoshopping can help but the presence of distinct shadows will limit the degree of effectiveness. The bottom line is that shots taken at the right time will look the most authentic and be the most visually impactful. The only effective solution is for the photographer to shoot a building at different times of the day to capture optimal sunlight on each side.

Case Study

Let’s take a look at a recent shoot – the new Lexington Visitors Center. I photographed the building at three different times to capture the best light for my client.

Morning – Back

The first series of shots were taken early morning to capture this side of the building in full sunlight.

gregg shupe architectural photography - lexington visitors center.jpg
Shupe architectural photography - lexington visitors center.jpg

Afternoon – front

I returned in the afternoon to capture the west facing front of the building in full sunlight (during the morning shoot this side of the building was dark and in shadow)

lexington visitors center front - shupe photography.jpg
lexington visitors center.jpg

Evening – Magic Hour

I then returned a third time, in the evening, just after sunset to capture an additional lighting scenario – the time of day photographers refer to as “magic hour” where you have the perfect mix of ambient and artificial light.

lexington visitors center magic hour shupe photography.jpg

Interiors

Yes, time of day definitely matters with interior shots. A staged interior is best shot with photographer lighting to draw your eye toward the staging and room architecture.  Conversely an empty or sparsely furnished room can benefit from strong sunlight to create “window graphics” on the empty floor. You can see an example below in the Visitors Center. The light pattern on the floor clearly adds interest and helps to fill the room. I had to be there at exactly the right time to capture the incoming light and place the window graphic where I wanted it on the floor. Think about that same picture without the window graphic – it would look flat and empty.

lexington visitors center interior shupe photography.jpg

 Surrounding Structures

We don’t tend to think about surrounding structures or trees until we set out to photograph a building  then realize they are stealing its light. We need to factor not only the sun’s position in the sky but also where and when shadows fall onto our subject building. Not too long ago I was asked to photograph Old City Hall in Boston. A commanding structure when it was built it is now dwarfed by much taller office buildings making the shot difficult as it falls in their shadows. In this case pre-shoot planning was critical as I had to observe the interplay of light and shadows throughout the day before I could determine an optimal time for the shoot.

old city hall shupe photograohy.jpg

 In some urban environments or situations such as time of year you need go to plan B – recognizing a daylight shot may not be your best option. In that case a twilight “magic hour” solution may be the best option. This can also be a good solution when, in the case of office buildings for example, you want them looking occupied. Later in the fall and particularly with the arrival of daylight savings time buildings are fully occupied at twilight (with current COVID exceptions) and all the lights are on. This can make for a great photo.

Light it Right

Shooting each aspect of a building in the correct light is imperative for quality architectural photography. That may mean coming back to the shoot different times throughout the day – or even on different days because of Mother Nature’s fickleness.

Preplanning is a critical element – it is important to scout the location for time of day, presence of surrounding structures and planning for contingencies. Also consider time of year and leave time in your due dates for potential weather delays.

When you are considering architectural photography make sure you remember that as light shifts around a building so must the photographer. (At Shupe Studios we gang our hours to enable this benefit in every project we undertake.)

Impressive pictures of your property are integral to successful marketing. Attention to detail, planning, and proper lighting pay big dividends. A myriad of things go into successful photography but when you think about architectural photography don’t forget rule number one - light it right.